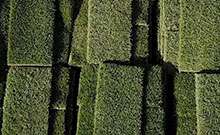
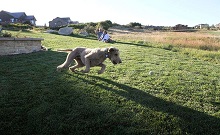
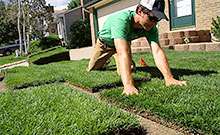
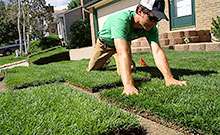
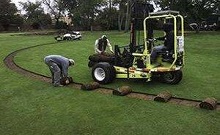
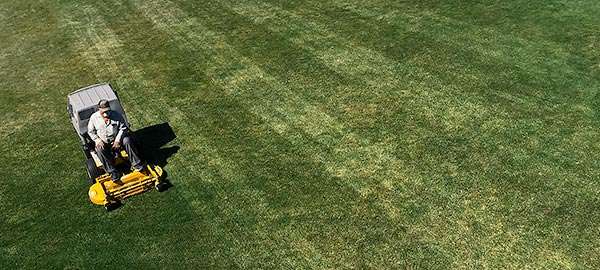
Colorado Blue™ is a drought tolerant blend of elite Kentucky bluegrasses that is a dense, fine textured turf. Kentucky bluegrass is a cool season grass that is well adapted to northern climates. Green Valley Turf Co. has selected four top trial varieties of Kentucky bluegrass to form our Colorado Blue™ Kentucky bluegrass sod. The varieties selected are top performers in the mountain west region and are well adapted to Colorado’s erratic weather. Colorado Blue™ thrives in moderate to high heat and tolerates extremely cold temperatures. The use of multiple Kentucky bluegrass varieties in the Colorado Blue™ sod adds genetic diversity for improved pest resistance and enables the sod to be used for a wide range of applications.
Ability to survive drought
Colorado Blue™ forms a dense, dark green sod with a fine leaf texture. Deep roots are produced in the early spring and again in the fall. During extreme summer heat, Colorado Blue™ sod has the ability to go into dormancy and survive extended periods without water. Our Colorado Blue™ Kentucky bluegrass can be maintained at mowing heights of 3.5 inches to as low as a half an inch, making it the perfect choice for home lawns, parks, and sport complexes. Kentucky bluegrass has excellent wear tolerance, and produces the safest surface for family activities and athletic events.
Thick, dense turf
The semi-aggressive nature of these elite varieties in our Colorado Blue™ produces the highest wear rating of any of our sods. Great year round color and thick density makes this sod an attractive choice for a wide variety of applications.
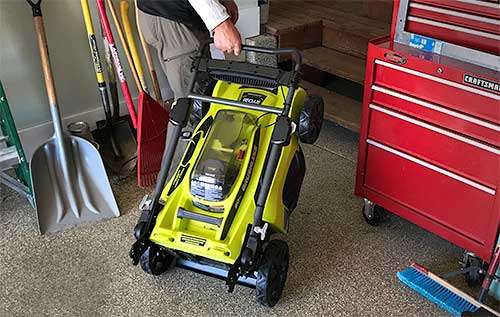
With the onset of spring, many of us have been pulling out our lawnmowers and beginning to get them prepped for the mowing season. Traditional gas mowers require routine maintenance, from changing spark plugs and oil to regular trips to the gas station before you can begin mowing. There’s a new solution that requires significantly less maintenance, is quieter, more eco-friendly, and significantly cheaper over time. Electric cordless lawnmowers come in a plethora of styles and cover a wide range of needs making them accessible to almost anyone. If you’ve been thinking about making the switch, now is the time.
Electric Lawn Mowers are Essentially Maintenance Free
Electric mowers require significantly less maintenance in comparison with gas mowers. Gas mowers need spark plugs, oil changes, fresh gas, and a pull start that can be tricky to get going. Mowing your yard can go from being a quick endeavor to a day’s project. Electric mowers, in comparison, are much easier to operate. Cordless mowers require a charge before you can get going, and depending on the size of your lawn and the battery, may require more than one charge to complete the job. Corded mowers, however, don’t need a charge — just plug and go! Both electric and gas mowers require the blades to be sharpened once or twice a season so that they don’t harm your grass as you’re mowing.
Easier operation
Gone are the days of fighting with your mower to get it to turn on. Electric mowers turn on with a button, making them much more manageable than gas mowers with their pull-cord starts. Many electric mowers come equipped with rear-wheel drive making it easier to maneuver your lawn as you mow. Electric mowers are also significantly lighter than gas mowers, which can eliminate the stress and strain that come from pushing a heavy mower around your lawn.
Easier storage and cleaning
Traditional mowers can be bulky, taking up lots of room in your garage, especially with all the equipment required to maintain them. We love electric mowers because they fold up in their charging docks and take up significantly less room. They are also easier to clean. All they require is sharpening the blade, removing caked-on debris, and a quick vacuum around the motor. This can be done once a year at the beginning of the mowing season.
Electric Lawn Mowers are significantly quieter.
Nothing is more disruptive to a peaceful morning or evening than the roar of a mower. Gas mowers can be quite disturbing, especially in the summer when it’s much better to mow in the morning or late evening to beat the heat. Another huge perk to electric mowers is that they are virtually silent. By eradicating the need for an engine, electric mowers cut way down on the sound they produce. This means mowing on a Sunday morning is no longer a nuisance to your neighbors! It’s also a big perk for golf courses or parks because it doesn’t disrupt the quiet serenity of the setting.
Electric Lawn Mowers are more Cost-Effective.
Corded electric lawn mowers are the most inexpensive choice and cost less than a gas mower would upfront. Cordless mowers can be a bit more expensive but are significantly cheaper over time. As we discussed earlier, gas mowers require gas, oil, and repairs from time to time. Over the lifetime of the mower, that can add up. Electric mowers save hundreds of dollars over their lifetime in comparison to gas mowers.
Electric Lawn Mowers are better for the environment!
Going electric is better for the environment, plain and simple. While lawns can be criticized for not being eco-friendly, a big part of that critique often points to the maintenance they require — specifically the gas intake and emissions from mowing. While we’ve debunked this idea that grass is bad for the environment, read more, switching to an electric mower is a huge part of making lawns greener! Anything we can do to reduce our emissions is significant for the earth. In many areas, you also have the option to source your electricity from a more sustainable option. If you haven’t yet, call your electricity provider and ask about using renewable energy to power your home.
While gas mowers do have some advantages, like being a bit more durable and being able to go for much longer than a cordless mower, electric mowers are great for the homeowner. They have plenty of power to keep your yard in tip-top shape. They are much easier to operate and maintain, save you money, and are much better for the environment. There’s never been a better time to switch to an electric mower!
Tackling that first mow of the year is a perfect way to get moving, enjoy some fresh air and bask in that Colorado sunshine! Mowing is an important part of spring lawn maintenance and plays a vital role in creating a healthy and productive growing season. Mowing helps to remove the dead grass left over from winter, stimulates new growth, and thickens your lawn up to have a strong base before summer heat kicks in. By being proactive in the spring, you set your lawn up for success all year long!
When to Mow
It can be difficult to tell when to start mowing as your grass slowly begins to start greening up. As regions vary on when they tend to warm up, there’s no set date on when to start. However, a general rule of thumb is to let the temperature rise consistently above 40 degrees Fahrenheit so that the grass and soil have completely thawed. It’s also wise to allow at least 2-3 inches of new growth to occur so that it doesn’t shock the lawn.
Mower Maintenance
Another important step in spring lawn care is maintaining your mower. Change the oil, air filter, and spark plug. Clean off excess dirt and dried grass clippings (unplug the spark plug before working near the blade of course!) And finally, make sure that the blades are extra sharp. Mowing with dull blades tears the leaves of grass and can leave your lawn more prone to insect damage and disease.
Follow The Rule of Thirds
You never want to cut more than 1/3rd the length of the blade off when mowing. Doing so severely stresses the turf and can lead to scalping and yellowing. Even when your lawn is very overgrown, you don’t want to mow more than 1/3 of the blade off. Instead, change the height of the mower and then lower it every 2-3 days until the grass reaches the desired height. For bluegrass, you want it to be between 2-3″ and for tall fescue, you’ll want to keep it between 2.5-3.5”.
Frequency of Mowing
In early spring, when the grass is still growing more slowly, you can mow once every week or two. But once spring kicks into high gear and your grass really starts to grow, it’s a good idea to mow every 4 to 6 days to keep your lawn manicured. By keeping blades short, it allows more sunlight to come in and heat up the soil, which in turn promotes growth and causes the sod to thicken up. So if there are any patches or your lawn is a bit sparse, try mowing more frequently and maintaining a regular watering schedule to get it back on track.
In summary, by being mindful of your lawn and mowing it properly in spring, you can set it up for success all year long. By taking good care of your mower and paying attention to the length of your grass, you can help your lawn grow thick, resilient, and brilliantly green. So go get outside and make your lawn look beautiful as we enjoy spring here in the front range!
One of the most controversial topics in the landscaping community is Artificial Turf. Is artificial landscaping better than natural grass? How about the health benefits of a natural vs artificial lawn? Is one better for the environment than the other? We’re here to debunk some of the myths around artificial sod.
Myth 1: Artificial turf uses less water
While this is true, it’s not necessarily the whole story. Artificial turf temperatures can soar, especially in summer. This requires water to cool it down if you want to be able to enjoy your lawn, especially in western climates where installing an artificial lawn might seem like a smart idea to save water. According to Turfgrass Producers International, artificial lawns have been documented to be up to 86.5*F degrees hotter than natural turf under identical conditions. On an average summer 90*F degree day, the surface of artificial turf will be 165*F degrees — that’s hot! Human skin begins to burn at 110*F for long exposures and as little as a few seconds at 165*F. This means frequent watering to cool the surface temperature down for your children or pets to enjoy on a summer day. Water is the only way to cool excessively hot artificial turf.
It can also contribute to the heat island effect. The heat island effect describes built up urban areas that are hotter than nearby rural areas. Which leads to increased energy consumption, elevated emissions of greenhouse gasses, compromised human health and comfort, and can lead to impaired water quality. Artificial turf elevates the temperature of the ground, which in turn elevates the overall temperature of the earth unless cooled by excessive and unnecessary watering.
Myth 2: Artificial turf is made from recycled materials
Many types of artificial lawns are made from plastics, mostly polyethylene and polypropylene — not actually recycled plastics. Plastic grass is a petroleum based product that emits greenhouse gases while it’s being produced. There’s just no getting around that. In addition, most artificial lawns last for about 8-10 years and after that can not be recycled. That ultimately means every 8-10 years the whole lawn has to be thrown away. And here’s the kicker — dumps won’t take them, they’re considered hazardous waste. They also contribute to the microplastics problem. Microplastics are found in our food, water, even in the soil, are consumed by animals — especially sea animals, and are extremely harmful and toxic. As artificial turf is made from plastic, it’s impossible for it to not contribute to the microplastic epidemic we are currently facing.
Myth 3: Artificial turf cuts down greenhouse emissions
Another common setback people point to with traditional lawns is the maintenance they require and the fact that lawnmowers and fertilizer aren’t exactly good for the environment. As we’ve already discussed, plastic turf is still made of plastic and does release greenhouse gases while it’s being made. Another common practice with artificial turf is to remove the soil below and replace it with rock which releases even more CO2 emissions! Overall, natural lawns contribute to filtering CO2 from the air while plastic sod actually does the opposite. It’s easy to make a natural lawn more environmentally friendly by making the switch to organic fertilizer and electric mowers, but artificial turf will continue to contribute to creating more unnecessary plastics, and therefore contribute to creating more greenhouse emissions.
Myth 4: Artificial turf helps bolster wildlife because it’s better for the environment
Artificial Turf provides absolutely no nutrients to any wildlife and actually harms very important members of our ecosystem — worms and bees. It seals the ground below keeping essential nutrients from finding their way back into the soil. Because of this, it starves earthworms from what they need to survive. This makes it impossible for them to continue to bolster the soil quality helping plants grow. We also know how important and crucial bees are to the environment, nothing grows without them! With the plummeting number of insects on earth it’s important to support these species as much as we can.
Myth 5: Artificial turf is cleaner than natural grass because it doesn’t require fertilizer.
Another area artificial turf falls short is in the health department. While natural grass can be criticized for its use of fertilizer and pesticides, there are tons of natural and effective alternatives out there. Organic fertilizer is a great option that still supports your lawn without all the harmful chemicals. Artificial turf is often filled with recycled tire crumbs which have high pollutant content — including lead. The CDC and EPA are currently studying the carcinogenic effects that being exposed to artificial fields may have on public health.
Myth 6: Artificial turf is more cost effective
Champions of artificial turf will say that an artificial lawn is more cost effective because they don’t require water or maintenance throughout the year. We already debunked the water myth earlier, and actually, artificial sod does still require maintenance. Especially in a professional setting. Artificial fields still require a field manager to keep up with the quality. For homeowners, this isn’t as much of a concern, but the initial price of installation is.
For a 500sq foot lawn, the average price of installing artificial sod is around $6,250. That’s nearly 5 times what it would cost to have a professional crew like our sod installation crew come to your house, fully soil prep and grade your lawn and then lay the sod for you. Installed artificial sod is typically between $5-$20 per square foot, on average about $12.50, versus natural sod which, with full soil prep grade and installation, costs about $2.70 or bought on it’s own and easily installed as a weekend DIY, about $0.71 per square foot.
Myth 7: Playing on artificial sod is the same risk as playing on natural sod
Given the rise of popularity of artificial turf for professional sports fields, many studies have come out in recent years tracking injury rates. The NFL has reported non-contact injuries are 27% higher on synthetic turf. Studies have also shown that there is a 50% higher chance of knee or ankle injury on artificial turf as opposed to natural grass. Artificial turf can also cause more turf burns, higher risk of concussion, and higher risk of ACL tears. Players generally prefer playing on natural grass, and Dick Allen, 1972 American League MVP, even said “If a cow can’t eat it, I don’t want to play on it”! How does this translate to the homeowner? Your kids and pets will use your yard to play. When doing so, they run a significantly higher risk of injury when it’s comprised of artificial turf. When it comes down to it, choosing a natural lawn will literally cut the risk of injury to your kids by half.
In Conclusion
While artificial turf certainly has some benefits, its overall impact on the environment is ultimately negative. Natural lawns are, in the grand scheme of things, the best and most environmentally friendly option out there. They are also more cost effective and significantly safer. For more information on the environmental benefits of natural lawns, see our previous blog “5 Reasons Lawns are Beneficial for the Environment”.
We remain determined to continue providing top-notch service and are announcing today a new way of making our stores and picked up items accessible while making things safer for our customers and employees.
Curbside service, Littleton and Platteville locations
Beginning Thursday, March 26, we will offer curbside service. Rather than ask you to come into our stores, purchase any sod or landscape item over the phone or online. Either call ahead or call when you’re in our parking lot or use our website gvt.net. We will help you shop over the phone and can accept credit cards and charge accounts. Please note we will not be accepting cash at this time. We will then deliver the items to your car in our parking lot or sod loading area in a touch-less manner.
Touchless Sod Loading
Call in your sod order and call us again when you get here. A Green Valley Turf Co. employee will coordinate a touchless sod loading experience. Sod deliveries will also be touchless. We want to keep everyone as safe as possible during these uncertain times.
All of us at Green Valley Turf Co. are grateful that we are an essential business, allowing us to continue to serve you when you need it most. We thank you for your patience and loyalty and look forward to continuing to provide you with the freshest agriculture products and essential construction products. – GVT
03/23/2020 Update
With the current global crisis ongoing, we wanted to update you on some current precautions, we as a company are taking to combat the spread of COVID-19.
Continued Business
While considering governor Polis’ announcement, we have decided to continue conducting business with several modifications to keep the workplace as safe as possible. We will continue providing quality sod and landscaping services. We have limited employees coming into work, and those who can work from home will do so. We have cut staff by 50% and are maintaining proper social distancing techniques throughout the day. We are also continuing to support employees financially and will continue doing so as the situation evolves.
Increased Presence Online and Via Phone
We are revamping our website. It is an excellent resource for DIY lawn care instruction and advice, as well as other information on how to maintain your yard. With all this extra time at home on our hands, now is a great time to get outside and spend some time doing yard work! We also plan to continue answering the phone, even in the event of a full closure of business, we will still be able to answer questions and offer advice.
Install and Delivery Crews to Remain Operational
Since the majority of our installation and delivery work is outside, we plan to continue with the business. We harvest sod with automatic sod harvesters, meaning there is no human contact from field to pallet. Our crews are wearing gloves and masks to load sod into cars and on deliveries. Sod crews will also be adhering to proper social distancing techniques, and we have encouraged everyone to stay home as much as possible. Sod and bulk material deliveries are a great option right now with almost no contact.
Take Advantage of This Time
We understand that this can be a very stressful and scary time for many members of our community. With all the extra time at home, this can be a great time to get to that yard work you’ve been putting off, and we are here to support you. For our professional clients, consider using this time for field maintenance without the stress of a normal game schedule. Public health and safety are of our utmost concern, and we will work with you to ensure all personnel follows the current government and CDC guidelines to create the safest and most healthy work environment for everyone.
Restricted Travel and Events
We have restricted all non-essential work-related travel for our employees and will not be attending any events over the next 30 days minimum.
We understand that this situation is ever-evolving and has been closely monitoring everything going on. At this point, these are the steps we are taking to keep not only our employees but the general public as safe and healthy as possible. We will continue to update the public on any changes, but for now, we are here to help!
In Denver we’ve been having a fairly mild winter, between snow storms there’s been beautiful weather and sunshine! With spring right around the corner, some of you may have started to think about redoing your lawn. Winter is actually a great time to sod! Although grass is mostly dormant, installing sod this time of year is actually completely doable. While its green color fades for the winter months, its stored energy is working hard to push new roots in search of deeper moisture in the winter. The lawn may not root as quickly this time of year, but once the temperatures start to rise your sod will take off!
The root system is still growing in winter
A huge advantage of laying sod in the winter is the fact that sod requires less water to keep it damp due to cooler temperatures. Even though the grass can look “dead”, it’s just dormant! The root system is still active and growing very slowly even in the winter months under a blanket of snow. As long as the grade is set, you can lay sod on frozen ground. With Colorado’s exceptional combination of sunshine and heavy, wet snow in the late winter months your yard will receive plenty of water, which is imperative during the first few weeks while it’s established. If you install sod in the spring you could be battling with mud and rainy weather, which can be a logistical nightmare. Installing sod while the ground is still frozen can avoid a huge mess and a scheduling and rescheduling disaster.
Use the sun to thaw out frozen sod
Sod does need to be unfrozen before installation, so pick a mild sunny day, and warm the frozen sod up in the garage or the sun. This will make it easier to install. Frozen sod is like trying to cut through concrete! But once it’s warmed up, it’s much easier to work with.
Prep your lawn for sodding
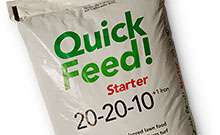
Installing sod in the winter is very similar to installing it at any other time of year. Make sure the ground is prepared and graded the way you’d like it to be. Apply starter fertilizer on the ground prior to laying the sod. We recommend our 20-20-10, but anything with a similar blend of Nitrogen, Phosphate, Potash and Iron will work! Next, lay the sod and pull the seams of the slabs tight. Water your new lawn anytime temperatures are over 40 degrees for as long as you can. Nothing helps a root system establish like a good soak! If the sod freezes after installation, don’t worry — the freeze will not harm your lawn.
Take Advantage of Natural Precipitation to Use Less Water
It’s not necessary to fully turn on sprinkler systems until the end of March. Watering new sod this time of year requires less water. If you do turn on sprinklers, blow them out or drain them to avoid freezing pipes. The amount of water needed varies, but due to cooler temperatures and natural precipitation you will likely go a week or so in between watering. Once covered in snow, there’s no need to water. On dry or warm days give the sod a little water. Use a garden hose until you can turn on your irrigation system. It’s best to keep your lawn very damp for the first few weeks while the root system is established. That way it can grow deep into the ground and create the most efficient lawn possible! This will ultimately help you save water down the road when the temperature starts heating up again.
What are you waiting for? Cover up that dirt and get a jump on establishing a new lawn!
Go to www.gvt.net and watch our video on how to install sod.
If you’ve been noticing brown spots in your yard, it is almost always because it’s not getting enough water. The odds of brown spots being caused by anything other than lack of water are very slim. So if you want to check the efficiency of your sprinkler system, the cup test is a great solution! The cup test allows you to test the spread of water over your lawn. Is my sprinkler system distributing water evenly? Are all of my sprinkler heads working as they should be? Should certain irrigation zones be getting more or less water than others? The cup test can help answer all of these questions.
What is the Cup Test?
The cup test entails setting out containers of the same size — plastic cups or rain gauges will work — in different locations around the yard. Place two cups in each sprinkler zone, one closer to the sprinkler head and one farther away, and run the sprinklers. This will determine how much water the sprinkler is putting out and how evenly. Often brown spots appear because sprinklers are clogged or not properly adjusted and are watering your yard unevenly.
How to perform the cup test
You can calculate the amount of water your sprinkler system is applying by running your sprinklers for approximately 15 minutes. Then, observe how much water is in each container and multiply that by 4. That will give you an idea of how much water is applied per hour. Calculating the hourly amount of water is useful for determining if your sprinkler system is distributing too much, too little, or just enough water to keep your yard healthy.
Understanding your findings
The cup test helps determine how much water is being laid down by your sprinklers. So, for example, if you run your sprinklers for 15 minutes, and each cup receives a quarter-inch of water, that means your sprinklers are distributing 1 inch of irrigation per hour. Kentucky Bluegrass traditionally needs about .25 to .5 inches of water per week in the cooler spring and fall months, and about 1 to 1.25 inches per week in the hotter summer months. So, knowing how much water your sprinkler system is distributing per hour is useful information to prevent over or underwatering.
Common Sprinkler Problems
Different sprinkler problems cause dry or brown spots in your lawn. Low pressure in your sprinkler heads can cause the water stream to be thin and not reach far enough. Alternatively, high water pressure can cause sprinklers to spray too far and miss the grass immediately surrounding the sprinkler head. Pop-up sprinklers can sometimes get caught in the ground and not emerge fully, only watering a portion of the area they should be. The cup test allows you to discern which sprinkler system problem could be causing issues in your lawn.
In Conclusion
The cup test is pivotal in making sure your sprinkler system is running as efficiently and effectively as it can be. By performing regular sprinkler maintenance and consistently checking that everything is running correctly, you can cut down on your water usage while still making sure your lawn is getting enough water to keep it thriving. For any questions on proper lawn maintenance and even a free rain gauge of your own, stop by our office or call us to chat with a professional!
It can be easy to write off turf as a sign of excess or purely there for aesthetics, but it couldn’t be further from the truth. According to one of America’s leading turf experts and the chief scientist at the International Sports Turf Institute, James B. Beard Ph.D., “As a society we tend to take the benefits of grass for granted”. Not only have lawns provided a backdrop for our children to play and our friends to gather for more than 10 centuries, but they can be a huge benefit to the environment. Choosing to have a living landscape as opposed to rock, mulch or plastic turf can help improve air and water quality, maintain cooler temperatures, and control soil erosion.
1. Lawns Filter and Capture Runoff
When it rains, lawns capture the rainwater and cause it to slow down instead of “sheet off”, which is when rain falls on hard concrete surfaces and turns into fast moving storm runoff. This provides excellent flood control by absorbing and filtering water. Lawns also enhance the water quality tremendously! Water filtering through the fibrous root system of sod and soil causes it to be much more balanced than water running off of blacktop and picking up all of the toxins there. In fact, Water filtered through a healthy lawn can be 10 times less acidic than water running off a hard surface.
2. Reduce Heat
Lawns can help combat the heat island effect, in which cities experience exponentially higher temperatures than the surrounding rural areas. The heat island effect leads to increased energy consumption, elevated emissions of greenhouse gasses, compromised human health and comfort, can lead to impaired water quality and even the death of aquatic animals. In one study focused on Los Angeles, experts found that getting rid of lawns and grassy parks and replacing them with native bushes and other drought hardy landscapes would increase daytime temperatures by 1.3*F on average. Lawns and other greenery help to keep the air temperature significantly cooler, and keep our cities a happier and easier place to live in.
3. Improve Air Quality
As we learned in biology class, plants use a process called photosynthesis to turn carbon-dioxide into oxygen. Because of this, plants are regarded as one of the main carbon sinks on the planet. Carbon sinks act like sponges and absorb carbon compounds, playing a huge role in controlling greenhouse gasses. According to a study from University of California, Davis, grasslands are more resilient and reliable carbon sinks than forests. Grass does such a good job storing carbon, that it as much as seven times outweighs the carbon used to maintain a lawn! Grass effectively captures airborne pollutants, smoke particles, and dust, pulling them out of the air. Plus, an average lawn also exudes enough oxygen to meet the daily needs of a family of four. So your yard provides your family with clean, fresh air while also working to diminish greenhouse gasses and make the planet better for future generations.
4. Supports Biodiversity
With human development, we have modified about 95% of nature, creating huge challenges for native plants and animals. Grasses, trees, and shrubs all support biodiversity by providing habitat for birds and small mammals. Under our lawns live all kinds of worms, spiders, and other insects who are pivotal in our ecosystem. By creating more green space for these little guys to thrive, we are supporting every part of the food chain and helping the circle of life to continue. Planting more greenery, including grass, native plants and trees, contributes to the healthy biodiversity of our earth and keeps all those little critters we love from going extinct.
5. Controls Soil Erosion
Soil erosion can be wildly detrimental to the quality of water. When soil erodes into streams and lakes, it causes the waters to get murky and prohibits sunlight from penetrating deeper into the water. This, combined with the added nutrients and chemicals can cause algae to grow, which suffocate aquatic insects and cause fish to die. Soil erosion can also lead to land and mudslides and put human life in danger. Lawns help combat this with their dense and fibrous root system that holds the earth in place. Healthy lawns root systems are strong and dig deep into the ground, holding everything together and saving the lives of many fish and people.
6. Sequester Carbon, Natural grass
It’s important to remember that lawns are beneficial to the environment, especially when they are cared for with an eco-conscientious mindset. When choosing sod, choose something that is well suited to your environment. There are hundreds of varieties of turf, so it’s easy to find one that makes sense for where you live. It’s also important to remember that over watering your lawn is not only bad for the environment, but very bad for your sod! Turf is resilient and ebbs and flows with the seasons. If your lawn starts to go dormant in the heat of the summer, that is ok! Lawns don’t need to be green all year, and in fact shouldn’t be. Grass grows in cycles based on the resources available to it. It will green up again when precipitation returns. It’s also a great idea to add native plants and grasses into your landscaping. By being thoughtful and making smart and informed decisions about your lawn you can make a huge difference in helping the planet!
Kentucky Bluegrass is the most widely used turfgrass in the Denver metro area. About 95% of all lawns and parks are Kentucky Bluegrass. Bluegrass produces a fine, dense textured turf that can stand up to heavy traffic and use. Bluegrass is a rhizomatous turf that spreads through underground roots or rhizomes and produces new grass plants to stay dense and thick. It is deep green and is very heat and cold tolerant, and is the best choice for high elevation use. Bluegrass also is very drought-resistant and will go dormant in the heat of the summer if not watered. Once it cools down in the fall and warms up in the spring, bluegrass fills itself in. If you want a fine lawn that can take a lot of abuse from kids and dogs, bluegrass is an excellent choice.
Can become dormant & survive 1 to 2 months without irrigation once it is established
Uses 24″ to 26″ of supplemental irrigation per year for high-turf quality
Uses 15″ to 20″ of supplemental irrigation per year for lower turf quality
Best grass for high-use areas and dogs
Tall Fescue
Turf Type Tall Fescue is becoming more common in the Denver metro area due to its ability to go longer between waterings. If Tall Fescue develops a deep root system in properly amended soil, it can capture water from a greater soil depth. This can translate into less irrigation or fewer waterings per week. Tall Fescue is very heat and cold-tolerant, it has a good green color and a medium size blade. When mowed lower and more regularly, Tall Fescue can come close to a bluegrass texture and appearance. Tall Fescue can become clumpy if it is not watered or cared for properly.
Uses 20″ to 22″ of supplemental irrigation per year for high turf quality if rooted deeply and subsurface moisture is present
It can root very deep and pull water from deeper down in the soil. Deep soil prep is recommended before sodding
Good turf quality, medium green, medium texture
Buffalograss
Buffalograss is a native, low-growing warm-season turfgrass that, once established, uses very little water. Buffalograss develops a very deep root system and likes clay soil. Because of this deep root system, it can draw water and nutrients from a large area. Buffalograss thrives on 1/4 inch of water per week during the heat of the season. Buffalograss is light green and has a soft fine blade that stops growing around 6 inches. It is slow-growing and only needs mowing every two to three weeks or can be let go for a native look. Buffalograss spreads and fills in with stolons or above-ground runners. Buffalograss goes dormant in the fall, September/October after the second frost and greens up in April. Natural rainfall will dictate when and if additional water is required for a buffalograss lawn.
Uses 8″ to 10″ of supplemental irrigation per year for good turf quality that will tolerate moderate traffic
Not best for the traditional lawn. It is brown and dormant from October to April. More of a native-type lawn.
Good turf quality, light green, medium texture, very soft to the touch.
July is Smart Irrigation Month. One of the key parts of saving water is to have a water efficient sprinkler system. To celebrate Smart Irrigation Month, we switched out our spray head nozzles for MP Rotators. MP Rotators are a type of sprinkler head nozzles that lowers the application rate of the water. Putting water on the ground slowly and evenly allows the water to soak into the ground.
Traditional spray heads tend to soak the lawn with a higher volume of water in a shorter period of time, spreading the water unevenly and creating dry spots in some sections of your lawn while overwatering others. Additionally, since the water is applied quickly, it doesn’t have adequate time to soak in. This can cause flooding in the lawn and run off onto the pavement. By switching away from spray head nozzles, these problems can be avoided and you can water up to 30% more efficiently. MP Rotators also use larger water droplets that are less affected by wind, wasting less water.
Water smart and save water
Simple sprinkler maintenance is another way to save water. It’s important to watch your sprinkler system run periodically to check that water is being distributed effectively. Check your yard for dry spots where your sprinklers may not be reaching, as well as signs of too much water, such as moss or mushrooms. Water smart! Adjusting your sprinkler schedule for rain and other weather conditions is a simple way to avoid overwatering.
So this July as temperatures soar, make sure to take some time to check up on your sprinkler system. Your lawn, your water bill, and the environment will thank you.
Happy Spring! The sun is starting to come out, everything is beginning to green up, and we’re starting to get those beautiful fleeting days of perfect weather — in between the record breaking blizzards of course! Spring is the perfect time to start waking up your lawn and giving it a little extra love before the heat of the summer really kicks in. By spending a little more energy on your lawn in the spring, you can set it up for success in the coming months. Here are our 4 steps to success with your spring lawn!
1. Aerate
Aeration is an important part of spring lawn maintenance because it opens up the soil. This allows your lawn to get more of the essential nutrients it needs to thrive. Aeration also helps to reduce thatch. Thatch is the layer of decomposing organic matter that settles just above the ground. The combo of thatch and hard, compact soil are especially prevalent after winter when your lawn has been dormant and packed with snow for several months. This combo of thatch and hard soil can suffocate the grass and prohibit oxygen and water from penetrating into the soil if it’s not managed regularly.
You never want to aerate a dormant lawn, but aerating during the spring months when there is active growth helps your lawn recover more quickly and strengthen itself. Aeration allows an easy flow of oxygen, water, and nutrients to the root system to create a happier, healthier and more resilient lawn. Afterall, your lawn is a living organism and it needs fresh air just like we do!
2. Mow
After you’ve aerated, it’s a good idea to mow your lawn. Mowing helps to thicken your lawn by promoting new growth. It cuts off the dead layer leftover from the winter months of dormancy and gives the new, green grass sprouting room to grow. Plants rely on their leaves to soak up the sunlight in order to perform photosynthesis. They grow much better when there is lots of leafy, green surface area to absorb that light. Cutting your lawn also allows more sunlight to reach the ground, which heats up the soil and stimulates growth.
After you aerate, you are left with dirt plugs in your lawn. By mowing, it helps to dissipate those plugs and can act like a top dressing for your lawn. Top dressing is when you put soil or sand over your existing sod to mix in with the organic matter, or thatch as we discussed above, and dilute that matter so more light can shine through. By breaking up those plugs you are doing just that, which ultimately leads to a thick, healthy, and beautiful lawn.
3. Fertilize
Next, you should fertilize. Fertilizing is a great way to give your lawn the tools it needs to grow stronger, thicker, and root more deeply. Overtime, soil loses its natural nutrients, so fertilizing is really important! By feeding your lawn in the spring, it can flourish and have the strength to withstand the hot and dry summer months. Fertilizer also makes your grass grow more quickly, which helps to thicken your lawn. We recommend our 20-20-10 fertilizer with iron. It covers all of the essential nutrients for plants — nitrogen, phosphate, and potassium to ensure that your lawn gets everything it needs. The added iron helps to maintain that lush green color.
Timing is imperative here as you want to be sure to fertilize when the grass is completely dry. If the blades are wet, the fertilizer can stick to them and will actually burn your lawn instead of nourish it. Make sure to time your fertilizing just before a storm (or turn on your irrigation system afterwards) so that the nutrients melt right into the soil and infiltrate deeply into the ground. By watering after fertilizing, it activates the fertilizer and pushes it into the soil where it can start nourishing your lawn.
4. Water, naturally!
Spring is an amazing time to take advantage of natural precipitation. Rain and snow storms are common and can really help you save on your water bill while making sure your lawn is getting properly watered. When your lawn is waking up it needs to be watered roughly twice a week, so it’s pretty easy to let mother nature do the work here. Make sure you keep your irrigation system off of a timer and only turn them on as needed. You would never want your sprinklers to be on during or around a rain or snowstorm — that’s wasting one of the world’s most valuable resources! Plus, as an added bonus, the water from rain and snow has a lower pH that is actually better for your plants than the city water. So be sure to take advantage of our wet springs!
In summary, by putting in a little extra work with your lawn in the spring, you can help set it up for success in the summer. Aerating and mowing to alleviate compacted soil and reduce thatch helps your lawn breathe and allows an easy exchange of nutrients to the root system. After you’ve opened up the soil, feed your lawn with our 20-20-10 plus iron fertilizer to make sure it has all of the nutrients it needs to grow thick and lush before the stress of hot, dry summer. Then, let mother nature do the rest by giving your lawn plenty of water as it wakes up from its long winter nap. By following these four easy steps, you will help your lawn grow stronger and deeper roots, which ultimately allows it to use less water and grow more resiliently in times of stress. And once again, happy spring!
Ultimate Guide to Spring Lawn Care Steps
Welcome to our comprehensive guide on spring lawn care steps, where we will walk you through everything you need to know to get your lawn spring-ready. As the snow melts away and the first signs of green appear, it's crucial to give your lawn the attention it deserves. Proper lawn care in spring is vital for a lush, healthy lawn all year round.
The Foundation of Spring Lawn Care
Before diving into the specifics, let's understand the foundation of effective spring lawn care steps. These steps are designed to revive your lawn from its winter dormancy and set the stage for robust growth in the coming months.
Step 1: Cleaning and Preparation
The first step in your spring lawn care regimen should be thoroughly cleaning. Remove any debris, leaves, or branches accumulated over the winter. This cleanup prevents disease and pests and allows sunlight and air to reach the grassroots more effectively. Learning about steps for lawn care in spring can provide a great starting point.
Step 2: Aeration and Dethatching
Aeration is a process that involves creating small holes in the soil to allow air, water, and nutrients to penetrate the grass roots. Dethatching, on the other hand, removes the thick layer of dead turfgrass tissue, known as thatch, which can suffocate your lawn. These two processes are vital for a healthy lawn, and understanding successful turf care is key.
Step 3: Overseeding and Fertilization
Overseeding is the process of sowing new grass seeds over existing turf. It helps in filling any bare spots and enhances the lawn's density and color. Following overseeding, a proper fertilization schedule should be adopted. Use a high-quality fertilizer that suits the specific needs of your lawn, considering the local climate and soil conditions. A lawn care pricing calculator can help manage your budget for these projects.
Step 4: Watering and Maintenance
Consistent watering is key to establishing a lush, green lawn. However, be mindful not to overwater, which can lead to root rot and other diseases. Establish a regular mowing schedule, keeping the blades sharp and never cutting more than a third of the grass's height to avoid stress on the lawn. A detailed Colorado lawn care schedule can guide you through this process, even if you're not in Colorado.
Spring lawn care is more than just a series of tasks; it's about setting your lawn up for success throughout the year. By following these steps, you can ensure a healthy, beautiful lawn that is the envy of the neighborhood. Consistency and attention to detail in your lawn care routine are key to achieving the best results.
As the season progresses, keep an eye on your lawn's health and be ready to adjust your care plan as needed. With the right approach, you can enjoy a vibrant, thriving lawn that enhances your home's curb appeal and offers a welcoming outdoor space for you and your family.
Spring in Colorado often brings heavy precipitation and cooler temperatures. Under these conditions, spring lawn care can be a little bit trickier. However, a little lawn maintenance can go a long way in the spring. Turning off sprinklers, keeping your lawn mowed, and removing clippings are all important to maintain the health of your grass. With all this natural moisture, there’s no need to water.
Turn Off Your Sprinklers
In times of heavy precipitation, the first thing to do is turn off your sprinklers! Let Mother Nature do her thing and keep your lawn nice and watered. There is no reason to be one of those people who has their sprinklers going in a rainstorm. It’s wasteful, and it’s not very good for your lawn. Overwatering, while fairly difficult to do, can lead to problems in your lawn. Patches may start dying, weeds can become overgrown and start crowding your grass, and fungi can start growing in overwatered lawns as well. By simply turning off your sprinklers during weeks of heavy precipitation, you can save your lawn a whole lot of trouble!
Keep your lawn mowed
With all this wet, cool weather, grass grows tall very quickly. However — your lawn is healthiest when it’s shorter. Mowing tall grass down allows it to grow thicker and filled in more. When grass grows tall, it becomes sparse, and the root system doesn’t dig down into the earth as deeply, causing it to be less efficient in the hot summer months looming ahead.
When mowing, wait for a break in the rain and get out there. Adjust your mower up so it will only mow off a third of the grass blades at a time. If you cut too much off at a time, it will shock the grass and cause it to die. For especially tall lawns, you should mow every 2 to 3 days, cutting off about a third of the length of the grass blades until it stands about 2-3 inches tall.
Remove excess clippings
After mowing, make sure that excess clippings get raked off of the sod. Lawn clippings can end up smothering the grass, or add to the thatch layer (the organic matter at the bottom of the grass leaf before the dirt and roots start). If the thatch layer gets too thick, it can end up blocking water and air movement to the roots and lead to excess water runoff. When this happens, it makes it very difficult for your lawns root system to access water no matter how much you are watering. By simply removing excess clippings in the wet season, you can keep your lawn from literally blocking itself from receiving water.
Utilizing the Wet Season
Following these three simple tips in the spring can make a huge difference in your lawn. Turning off sprinklers during times of heavy precipitation helps prevent overwatering. Mowing encourages grass to grow thicker instead of tall and stringy — creating a strong root system that will withstand the heat of the summer. Removing clippings allows the healthy flow of air and water to the root system instead of creating a wall of decomposing matter that prohibits water from reaching roots and can cause your yard to dry out. Keeping up with your yard in the spring will set you up for huge success when the summer heat kicks up.
Winter is a great time to get to know the different areas of your lawn. By using the winter weather, you can see if your lawn has heat sinks and areas in your yard that tend to be hotter than the rest. A quick Google search will show anything from dissipating heat from high-intensity outdoor lighting to heated indoor sinks that are available for those not fond of cold porcelain. However, for this blog, we’re going to focus on the kind of heat sinks that affect the different areas of your yard.
Heat sinks are elements that absorb, store, and dissipate heat or reflect and redirect heat. One example of a large-scale heat sink would be the elevated temperatures in cities due to all of the concrete and glass structures. The same sort of thing can happen in your yard. This can be caused by brick walls, large windows, stone retaining walls, sidewalks, or even buried objects like metal or concrete piping. These heat sinks can cause a lot of problems for your yard.
By paying close attention to the way the snow melts in your yard, you can easily see what areas are prone to drying out first. The low, southern orientation of the sun during winter months often intensifies the melting of snow cover and helps us locate general areas that might contain a heat sink. Look around at surrounding structures to see if there might be something accelerating rapid snow melt. A lot of times there’s not much that can be done about a heat sink without removing the source, which is often not possible. However, there are other means to alleviate the stress that it puts on your lawn.
Pile snow on bare turf
To avoid losing turf or developing extremely stressed turf before spring, you want to periodically water your lawn throughout the winter months. You can also pile additional snow onto heat sink areas to give them a temporary boost. Once it starts warming up in the spring, check your sprinklers. Make sure they are adequately covering the areas that need it, potentially increasing the nozzle size or even adding an extra sprinkler. Another option is putting in some shrubs or trees to reduce the intensity of the sun.
Identifying the heat sinks in your lawn is one of the first steps to having a beautiful, green lawn all summer long. By identifying the areas that have trouble and paying extra attention to them while it’s still cold, they’ll be more adept at handling the hot summer months.
In the heat of the summer, watering can sometimes feel like a fruitless endeavor. Lawns are dry, and watering may not seem to be helping. If you have spray or pop-up sprinkler heads, then this could be the answer. Soak and spray means watering in smaller intervals over a longer period of time rather than one full watering all at once. So, for example, if you normally water your lawn for about 15 minutes straight, using the soak and spray method, you would water for 5 minutes, then wait for a bit and repeat that 2 more times. Your lawn still gets the same amount of water, but giving it a break in between is one of the best things you can do for your lawn.
Let the water soak into the lawn
The soak and spray method is effective because it gives the water time to sink into the ground instead of collecting on the surface and causing runoff. Water can only percolate through the soil at a rate of about 0.2 inches per hour, which is why it seems like your yard isn’t getting watered enough. When most of the water isn’t even going into the soil, it definitely isn’t going to keep your lawn green. Using the soak and spray method also promotes deeper roots for your lawn. When the water is able to get deeper into the ground, this makes the grass grow a deeper root system. Another advantage of a deeper root system is that it will ultimately save water as well. When the grass can access water from deeper in the ground, it can pull more water from a larger area and you waterless.
Water in the evening
Another important aspect of the soak and spray method is to make sure that your sprinklers are running well and are spraying where you want them. Remember to only water in the late evening or early morning. Watering during the hot daylight hours can cause up to 30% of the water to evaporate before it even reaches the ground. So watering when it’s much cooler allows more water to actually reach the ground.
By maintaining your sprinkler health and keeping your lawn well-watered, you can help establish a healthy lawn. If you’ve been struggling to keep your grass green this summer, the soak and spray method will be just the right thing to make your yard green and beautiful.
As cooler spring days fade into the heat of summer, new lawns are plagued with brown spots. This is an easy fix! Typically, brown spots are caused by a lack of watering. New sod is especially prone to drying out because of its shallow root system. Brown spots occur when sod dries out and experiences drought shock. Sod will go into dormancy to combat the lack of water it’s experiencing. Once dormant, it needs water or it will die. Oftentimes, edges of sod dry out first because they are exposed to the moist air. Spotting in sod occurs for a variety of reasons, but it mostly depends on how water is dispersed around the yard. If the grade of your lawn has dips and valleys, it can cause uneven watering patterns. If certain spots get less water, even a tiny bit less, it could be enough to turn them brown.
Why is new sod more prone to brown spots?
New sod has a very shallow and underdeveloped root system that’s only about ¾ of an inch deep. Wind or hot air can cause the plant to dry out. A lot of times the ground below new sod will be wet but the sod itself is drying out. The root system needs a chance to establish deeper into the ground before it can access that water. Without a more mature root system, new sod relies on you to keep it watered. It takes 6-8 weeks for the sod to establish a strong enough root system to take in water from the ground. In the meantime, it’s up to you to keep it well watered while it grows!
How do I fix brown spots in my lawn?
Now that you know a little more about why brown spots are caused, you’re probably wondering how to fix them. The answer is water. Especially with the hot summer weather. Oftentimes watering every day is not enough for new lawns! If the grass is dry, it needs water. Especially in the first 8 weeks after it’s installed. Watering your lawn for a longer period at night is a great idea. It gives the sod a thorough drink that won’t evaporate right away with the heat of the day. It’s still important to periodically water throughout the day.
Will Fertilizer fix brown spots?
Fertilizer won’t help your grass until it’s green and healthy again. If the sod is dying, the fertilizer won’t take. Wait to fertilize until it has greened back up. Once your sod is healthy, fertilizer helps it grow and establish the deeper root system it needs. So what it comes down to is more frequent irrigation cycles and hand watering the brown spots until that root system becomes established.
Although brown spots in new lawns can be frustrating, it’s sod’s way of asking for a drink. So keep your brand new lawn happy and healthy by making sure it gets plenty of water when brown spots appear!
New Sod Turning Brown - Causes and Solutions
When you've invested time and money into laying new sod, it can be disheartening to see it turning brown. But don't worry; you're not alone, and there are solutions. In this post, we'll explore the common reasons why new sod turns brown and what you can do to fix it.
Common Reasons Why Sod Turns Brown
There are several reasons why your new sod might be turning brown, including:
Insufficient watering
Poor soil preparation
Pests or diseases
Improper mowing
Each of these factors can contribute to the browning of your sod, and it's important to identify the root cause of the problem before attempting to fix it. Let's dive deeper into each of these causes and explore how you can address them to ensure a lush, green lawn.
1. Check Your Watering Schedule
One of the most common reasons why sod turns brown is insufficient watering. New sod requires a lot of water to establish roots in the soil. Make sure you are watering your sod enough, especially during hot or dry weather. A good rule of thumb is to water the new sod daily for the first few weeks, then gradually reduce the frequency as the sod establishes roots.
When watering your sod, it's important to ensure that the water penetrates the soil to a depth of at least 4 to 6 inches. This encourages deep-root growth and helps the sod establish a strong, healthy foundation. You can use a screwdriver or similar tool to check the moisture level of the soil. If the screwdriver easily penetrates the soil, then it's likely that your sod is receiving enough water. If the soil is hard and dry, you'll need to increase your watering frequency or duration.
2. Improve Soil Preparation
Poor soil preparation can also lead to brown sod. Before laying new sod, it's essential to prepare the soil properly. This includes removing weeds, tilling the soil, and adding necessary nutrients. Learn more about soil preparation for sod new sod is brown. Testing your soil's pH level and nutrient content can also help you identify any deficiencies that need to be addressed.
When preparing the soil for sod, it's important to remove any rocks, roots, or other debris that could interfere with root growth. You should also level the soil to ensure that the sod lays flat and has good contact with the soil. If your soil is compacted, consider aerating it to improve drainage and allow the roots to penetrate the soil more easily. Adding organic matter, such as compost, can also improve soil structure and provide essential nutrients for your sod.
3. Watch Out for Pests and Diseases
Pests and diseases can also cause sod to turn brown. Common pests that affect sod include grubs, sod webworms, and armyworms. Diseases like brown patches, dollar spots, and pythium blight can also cause brown spots on sod. Keep an eye out for signs of infestations or infections and treat them promptly. If you're unsure how to handle pests or diseases, consult with a professional or reach out to your local extension office for advice.
Preventing pests and diseases starts with proper lawn care. A healthy lawn is less likely to be affected by pests and diseases. Make sure you are fertilizing your lawn according to the needs of your grass type, and avoid overwatering, as this can create a conducive environment for pests and diseases. Regularly inspect your lawn for signs of pests and diseases, and treat them promptly to prevent them from spreading.
4. Practice Proper Mowing Techniques
Improper mowing can stress out new sod and cause it to turn brown. Make sure you are mowing at the right height and with sharp blades. Also, avoid mowing when the grass is wet to prevent the spread of diseases. Check out our articleswhy is my sod turning brown and why is my new sod turning brown for options that are easy to maintain.
When mowing your lawn, it's important to follow the "one-third rule," which means you should never remove more than one-third of the grass height at a time. Cutting too much grass at once can stress the sod and cause it to turn brown. Also, make sure your mower blades are sharp, as dull blades can tear the grass and create jagged edges that are more susceptible to disease. Mowing in different directions each time can also help prevent compaction and encourage even growth.
5. Seasonal Lawn Care
Your lawn's needs change with the seasons, and it's important to adjust your lawn care routine accordingly. In the spring, focus on fertilizing and aerating your lawn to promote healthy growth. During the summer, water your lawn regularly and monitor for pests and diseases. In the fall, consider overseeding to fill in any bare spots and improve the overall thickness of your lawn. Winter is a time for rest, but you can still protect your lawn by avoiding walking on it when it's frozen.
6. Common Mistakes to Avoid
When caring for your new sod, it's important to avoid common mistakes that can lead to brown patches. Avoid overwatering, as this can lead to root rot and other problems. Also, avoid under-watering, as this can cause the grass to dry out and turn brown. Be sure to use the right type of fertilizer for your grass type, and avoid fertilizing during hot or dry periods. Lastly, avoid mowing your lawn too short, as this can stress the grass and make it more susceptible to pests and diseases.
7. Choosing the Right Type of Sod
Not all sod is created equal, and the type of sod you choose can have a big impact on its success. When selecting sod, consider your climate, soil type, and the amount of sunlight your lawn receives. Some types of grass are better suited to certain conditions than others. For example, Bermuda grass is a good choice for hot, sunny climates, while fescue grass is better suited to cooler, shadier conditions. Consult with a professional or your local extension office to determine the best type of sod for your lawn.
8. Tips for Maintaining a Healthy Lawn
Maintaining a healthy lawn requires regular care and attention. Here are some tips to help you keep your lawn looking its best:
Water your lawn deeply and infrequently to encourage deep root growth.
Fertilize your lawn according to the needs of your grass type.
Keep your mower blades sharp and mow at the right height for your grass type.
Aerate your lawn regularly to improve drainage and reduce compaction.
Monitor for pests and diseases and treat them promptly.
Conclusion
With the right care, your new sod should thrive and provide you with a beautiful, green lawn. Remember to water sufficiently, prepare the soil properly, watch out for pests and diseases, and practice proper mowing techniques. If you follow these steps, you should be able to prevent your sod from turning brown and enjoy a lush, healthy lawn for years to come.
For more information on maintaining a healthy lawn, check out our other resources and articles available on our website.
The rabbit population seems to be running rampant this year! It could be due to the extra precipitation we’ve been having. More water leads to more growth in vegetation and creates more food for these furry little guys. If their food is abundant, the number of litters will increase. On average, rabbits have about 2-6 litters per year, each containing up to 6 babies. Rabbits use grass and weeds not only to provide food, but also as shelter for themselves and their young. These furry friends spend the entirety of their life on less than 10 acres total, so there’s a good chance that once they’ve made a home out of your lawn, without deterrent, they’re here to stay.
How Rabbits damage your lawn
Typically, rabbit damage can create big problems for yards. They gnaw plants down to the root and concentration of urine can create brown spots in lawns. If you’ve been noticing spots in your yard that have been suspiciously mowed down and are beginning to brown, our furry friends are likely the culprit. Rabbits love to eat grass, and will munch it all the way down to the crown. This puts a lot of stress on the plant. If areas of your lawn have been damaged, the best thing to do is to fence off the area and keep it well watered and fertilized to help it grow back. The rabbits don’t eat the root system, so your lawn has a great chance of coming back.
Getting rid of Rabbits in your lawn
Although getting rid of established rabbit families is difficult, it isn’t impossible. Rabbits love anything that provides shelter, like low-to-the-ground shrubs, bushes, and taller grass. By eliminating areas they can hide, it makes their lives more difficult. Trim shrubs and bushes, put chicken wire below porches and elevate any decorative garden pieces that may be offering them refuge. You can also cut off their food supply. Fence off gardens, making sure fence openings are smaller than a rabbit’s head and dug 6 inches into the ground so they can’t go underneath. Spraying different odors on your plants, like capsaicin (pepper extract), castor oil, ammonium salts, or predator urine can also help! However, it must be reapplied after every watering or rain. It’s also smart to utilize your pets. Get your dogs to chase the rabbits, or let your cat outside to be the fearsome predator they are!
Rabbit damage can be very frustrating. It creates brown spots in your lawn and can ruin a garden if it goes unchecked. However, with the right prevention and proper lawn care, you can get the furry nuisances to leave your lawn alone!
How to Deal With Rabbit Holes in Your Yard
Discovering rabbit holes in yards can be a significant issue for many homeowners. Not only do these burrows detract from the visual appeal of your lawn, but they can also signal a deeper problem with wildlife in your vicinity. This article will delve into effective methods for addressing rabbit holes and preventing further damage to your lawn.
Understanding Rabbit Behavior
Rabbits are notorious for their digging habits, which can substantially harm gardens and yards. Grasping their behavior is crucial in tackling this challenge. Rabbits dig burrows for shelter and reproduction, potentially increasing their population on your property. Besides the unsightly holes, rabbits can feed on your garden's vegetation and grass, worsening the condition of your lawn.
To gain insights into the impact rabbits can have on your lawn and possible countermeasures, explore our guide on do rabbits eat grass.
Preventative Strategies
Preventing rabbit incursions is crucial. Here are some effective strategies:
Fencing: Erecting a fence can effectively prevent rabbits from accessing your property. It should be buried a few inches into the ground to block digging attempts.
Repellents: Using commercial or natural repellents can deter rabbits. Garlic or chili pepper sprays are useful natural alternatives.
Habitat modification: Making your yard less appealing by removing shelters like low shrubbery can discourage rabbits from settling.
For those facing severe wildlife control issues, understanding the methods for rabbit grass and small mammal management is vital for maintaining a healthy lawn.
Repairing Rabbit Damage
After mitigating the rabbit threat, repairing your lawn is the next step. This may include filling rabbit holes and reseeding damaged areas. A well-maintained lawn can deter rabbits and other wildlife from returning.
For maintaining a pristine lawn, especially post-rabbit damage, our bunny in grass management strategies provide excellent tips.
Professional Intervention
In cases of significant infestations or persistent damage, professional help may be required. Wildlife control experts can offer tailored solutions for a rabbit-free yard and help prevent future issues.
Deciding when it's necessary to seek experts can be aided by understanding the implications of having a rabbit in backyard good or bad. While rabbits contribute to local ecosystems, their presence should not compromise your lawn's health and aesthetics.
Conclusion
Dealing with rabbit holes in your yard can be challenging, but with the right strategies, it's manageable. Understanding rabbit behavior, implementing preventative measures, and repairing damage are vital to maintaining a beautiful, rabbit-free lawn. Effective wildlife management involves balancing your lawn's health with coexisting with local fauna.
Buffalograss (Buchloe dactyloides) is a warm season grass that is native to Colorado. Uniquely adapted to our semi-arid climate, buffalograss performs well at elevations up to 6,500 feet. In Colorado, buffalograss begins to green up around May. The peak growing season is during the heat of the summer, and fall dormancy is initiated with frost typically during the month of September. Buffalograss has a slow, vertical growth that reaches a maximum height of about 6 inches. Because of this, Legacy does not require a set mowing schedule. If you’re looking for a more natural look, Legacy can be left un-mowed without ever looking matted or neglected. However, a more manicured look can be achieved by mowing every 2 weeks at a mowing height of 2 inches. The unique characteristics of Buffalograss led to extensive research at the University of Nebraska to develop varieties for commercial production that contained the same traits that attracted people to buffalograss initially. The Legacy variety of buffalograss originated from Nebraska’s research and won the “Green Thumb” award in 2001 for the top new plant introduction of the year.
Requires substantially less water and mowing
Legacy is a second generation turf-type buffalograss that forms a moderately dense stand of turf. The vegetatively propagated all-female grass has very few seed and pollen heads and is only available in plugs or sod. Legacy has a soft and narrow blade, making it ideal for lawns. Legacy requires substantially less water than other sod forming grasses, thriving on only ¼ an inch of water per week. Once established, there can be up to an 80% reduction of water requirements compared with traditional cool season lawn grass. Be sure not to over water established buffalograss since it encourages weed invasion and makes the grass less aggressive. Legacy buffalograss spreads through stolons, which are above ground lateral runners that allow the grass to fill in bare areas. There are low fertility requirements, needing only ½ lbs to 2 lbs of nitrogen per year, applied in May and July. Buffalograss needs full sun to really thrive.
Turf-type Buffalograss sod
Legacy is in a league of its own when it comes to efficient water use and low irrigation requirements. Properly established and maintained Legacy buffalograss will form a beautiful and quality sage-green sod lawn with far less effort than other traditional cool season grasses.
RTF® Water Saver Tall Fescue is an exciting new self-repairing grass. RTF stands for “Rhizomatous Tall Fescue.” Rhizomes are underground plant structures that cause the grass to spread and fill in weak or damaged areas. The rhizomes in RTF are similar to the runners on strawberry plants, only these are underground. Aesthetically, RTF is a pleasing dark green color. RTF exhibits excellent spring green up and maintains good color throughout the summer and into late fall. With a slightly courser leaf texture than traditional sod, RTF adds a pleasant texture to home lawns and commercial landscapes.
Deep root system
RTF is characterized by an extensive fibrous root system that excels at extracting water from deep within the soil profile. Trials conducted at the University of New Mexico show that RTF can maintain high turf quality and use up to 30% less water. RTF performs well in full sun and in sites with moderate to high shade.
Sun and Shade
RTF is well adapted to mowing heights of 2.5 inches or can be left un-mowed for a wispy, natural look. Additionally, RTF is a low thatch producing grass and does not require core aeration for organic thatch removal as frequently as other grasses. RTF® Water Saver Tall Fescue is an all around performer and another great option for Colorado landscapes.