Spring in Colorado often brings heavy precipitation and cooler temperatures. Under these conditions, spring lawn care can be a little bit trickier. However, a little lawn maintenance can go a long way in the spring. Turning off sprinklers, keeping your lawn mowed, and removing clippings are all important to maintain the health of your grass. With all this natural moisture, there’s no need to water.
Turn Off Your Sprinklers
In times of heavy precipitation, the first thing to do is turn off your sprinklers! Let Mother Nature do her thing and keep your lawn nice and watered. There is no reason to be one of those people who has their sprinklers going in a rainstorm. It’s wasteful, and it’s not very good for your lawn. Overwatering, while fairly difficult to do, can lead to problems in your lawn. Patches may start dying, weeds can become overgrown and start crowding your grass, and fungi can start growing in overwatered lawns as well. By simply turning off your sprinklers during weeks of heavy precipitation, you can save your lawn a whole lot of trouble!
Keep your lawn mowed
With all this wet, cool weather, grass grows tall very quickly. However — your lawn is healthiest when it’s shorter. Mowing tall grass down allows it to grow thicker and filled in more. When grass grows tall, it becomes sparse, and the root system doesn’t dig down into the earth as deeply, causing it to be less efficient in the hot summer months looming ahead.
When mowing, wait for a break in the rain and get out there. Adjust your mower up so it will only mow off a third of the grass blades at a time. If you cut too much off at a time, it will shock the grass and cause it to die. For especially tall lawns, you should mow every 2 to 3 days, cutting off about a third of the length of the grass blades until it stands about 2-3 inches tall.
Remove excess clippings
After mowing, make sure that excess clippings get raked off of the sod. Lawn clippings can end up smothering the grass, or add to the thatch layer (the organic matter at the bottom of the grass leaf before the dirt and roots start). If the thatch layer gets too thick, it can end up blocking water and air movement to the roots and lead to excess water runoff. When this happens, it makes it very difficult for your lawns root system to access water no matter how much you are watering. By simply removing excess clippings in the wet season, you can keep your lawn from literally blocking itself from receiving water.
Utilizing the Wet Season
Following these three simple tips in the spring can make a huge difference in your lawn. Turning off sprinklers during times of heavy precipitation helps prevent overwatering. Mowing encourages grass to grow thicker instead of tall and stringy — creating a strong root system that will withstand the heat of the summer. Removing clippings allows the healthy flow of air and water to the root system instead of creating a wall of decomposing matter that prohibits water from reaching roots and can cause your yard to dry out. Keeping up with your yard in the spring will set you up for huge success when the summer heat kicks up.
Winter is a great time to get to know the different areas of your lawn. By using the winter weather, you can see if your lawn has heat sinks and areas in your yard that tend to be hotter than the rest. A quick Google search will show anything from dissipating heat from high-intensity outdoor lighting to heated indoor sinks that are available for those not fond of cold porcelain. However, for this blog, we’re going to focus on the kind of heat sinks that affect the different areas of your yard.
Heat sinks are elements that absorb, store, and dissipate heat or reflect and redirect heat. One example of a large-scale heat sink would be the elevated temperatures in cities due to all of the concrete and glass structures. The same sort of thing can happen in your yard. This can be caused by brick walls, large windows, stone retaining walls, sidewalks, or even buried objects like metal or concrete piping. These heat sinks can cause a lot of problems for your yard.
By paying close attention to the way the snow melts in your yard, you can easily see what areas are prone to drying out first. The low, southern orientation of the sun during winter months often intensifies the melting of snow cover and helps us locate general areas that might contain a heat sink. Look around at surrounding structures to see if there might be something accelerating rapid snow melt. A lot of times there’s not much that can be done about a heat sink without removing the source, which is often not possible. However, there are other means to alleviate the stress that it puts on your lawn.
Pile snow on bare turf
To avoid losing turf or developing extremely stressed turf before spring, you want to periodically water your lawn throughout the winter months. You can also pile additional snow onto heat sink areas to give them a temporary boost. Once it starts warming up in the spring, check your sprinklers. Make sure they are adequately covering the areas that need it, potentially increasing the nozzle size or even adding an extra sprinkler. Another option is putting in some shrubs or trees to reduce the intensity of the sun.
Identifying the heat sinks in your lawn is one of the first steps to having a beautiful, green lawn all summer long. By identifying the areas that have trouble and paying extra attention to them while it’s still cold, they’ll be more adept at handling the hot summer months.
In the heat of the summer, watering can sometimes feel like a fruitless endeavor. Lawns are dry, and watering may not seem to be helping. If you have spray or pop-up sprinkler heads, then this could be the answer. Soak and spray means watering in smaller intervals over a longer period of time rather than one full watering all at once. So, for example, if you normally water your lawn for about 15 minutes straight, using the soak and spray method, you would water for 5 minutes, then wait for a bit and repeat that 2 more times. Your lawn still gets the same amount of water, but giving it a break in between is one of the best things you can do for your lawn.
Let the water soak into the lawn
The soak and spray method is effective because it gives the water time to sink into the ground instead of collecting on the surface and causing runoff. Water can only percolate through the soil at a rate of about 0.2 inches per hour, which is why it seems like your yard isn’t getting watered enough. When most of the water isn’t even going into the soil, it definitely isn’t going to keep your lawn green. Using the soak and spray method also promotes deeper roots for your lawn. When the water is able to get deeper into the ground, this makes the grass grow a deeper root system. Another advantage of a deeper root system is that it will ultimately save water as well. When the grass can access water from deeper in the ground, it can pull more water from a larger area and you waterless.
Water in the evening
Another important aspect of the soak and spray method is to make sure that your sprinklers are running well and are spraying where you want them. Remember to only water in the late evening or early morning. Watering during the hot daylight hours can cause up to 30% of the water to evaporate before it even reaches the ground. So watering when it’s much cooler allows more water to actually reach the ground.
By maintaining your sprinkler health and keeping your lawn well-watered, you can help establish a healthy lawn. If you’ve been struggling to keep your grass green this summer, the soak and spray method will be just the right thing to make your yard green and beautiful.
As cooler spring days fade into the heat of summer, new lawns are plagued with brown spots. This is an easy fix! Typically, brown spots are caused by a lack of watering. New sod is especially prone to drying out because of its shallow root system. Brown spots occur when sod dries out and experiences drought shock. Sod will go into dormancy to combat the lack of water it’s experiencing. Once dormant, it needs water or it will die. Oftentimes, edges of sod dry out first because they are exposed to the moist air. Spotting in sod occurs for a variety of reasons, but it mostly depends on how water is dispersed around the yard. If the grade of your lawn has dips and valleys, it can cause uneven watering patterns. If certain spots get less water, even a tiny bit less, it could be enough to turn them brown.
Why is new sod more prone to brown spots?
New sod has a very shallow and underdeveloped root system that’s only about ¾ of an inch deep. Wind or hot air can cause the plant to dry out. A lot of times the ground below new sod will be wet but the sod itself is drying out. The root system needs a chance to establish deeper into the ground before it can access that water. Without a more mature root system, new sod relies on you to keep it watered. It takes 6-8 weeks for the sod to establish a strong enough root system to take in water from the ground. In the meantime, it’s up to you to keep it well watered while it grows!
How do I fix brown spots in my lawn?
Now that you know a little more about why brown spots are caused, you’re probably wondering how to fix them. The answer is water. Especially with the hot summer weather. Oftentimes watering every day is not enough for new lawns! If the grass is dry, it needs water. Especially in the first 8 weeks after it’s installed. Watering your lawn for a longer period at night is a great idea. It gives the sod a thorough drink that won’t evaporate right away with the heat of the day. It’s still important to periodically water throughout the day.
Will Fertilizer fix brown spots?
Fertilizer won’t help your grass until it’s green and healthy again. If the sod is dying, the fertilizer won’t take. Wait to fertilize until it has greened back up. Once your sod is healthy, fertilizer helps it grow and establish the deeper root system it needs. So what it comes down to is more frequent irrigation cycles and hand watering the brown spots until that root system becomes established.
Although brown spots in new lawns can be frustrating, it’s sod’s way of asking for a drink. So keep your brand new lawn happy and healthy by making sure it gets plenty of water when brown spots appear!
New Sod Turning Brown - Causes and Solutions
When you've invested time and money into laying new sod, it can be disheartening to see it turning brown. But don't worry; you're not alone, and there are solutions. In this post, we'll explore the common reasons why new sod turns brown and what you can do to fix it.
Common Reasons Why Sod Turns Brown
There are several reasons why your new sod might be turning brown, including:
Insufficient watering
Poor soil preparation
Pests or diseases
Improper mowing
Each of these factors can contribute to the browning of your sod, and it's important to identify the root cause of the problem before attempting to fix it. Let's dive deeper into each of these causes and explore how you can address them to ensure a lush, green lawn.
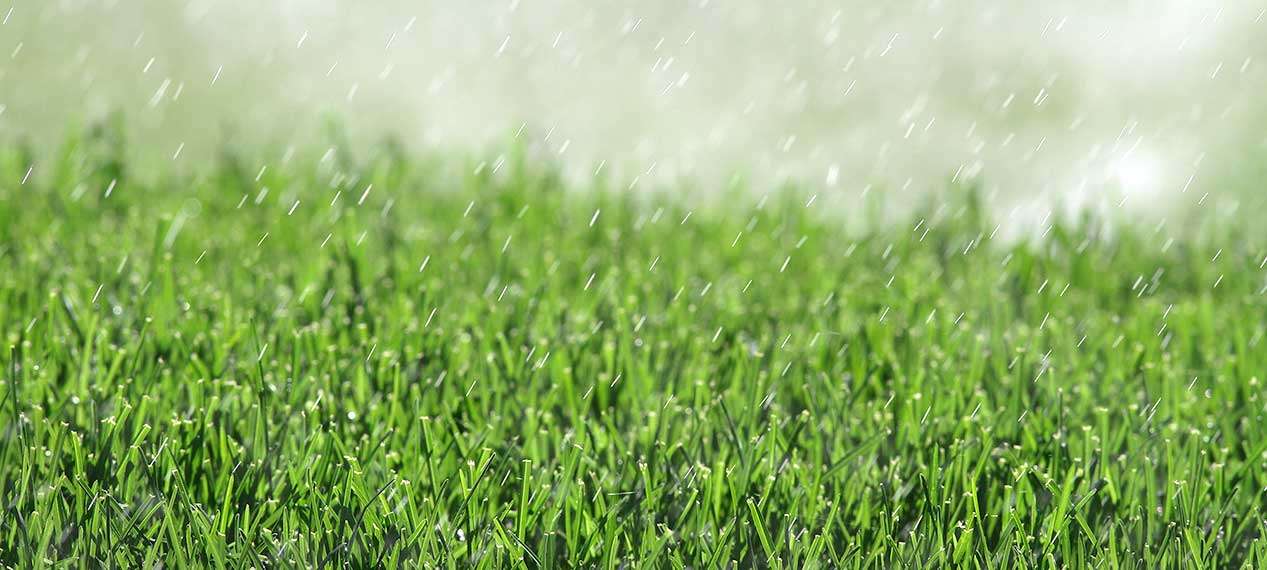
1. Check Your Watering Schedule
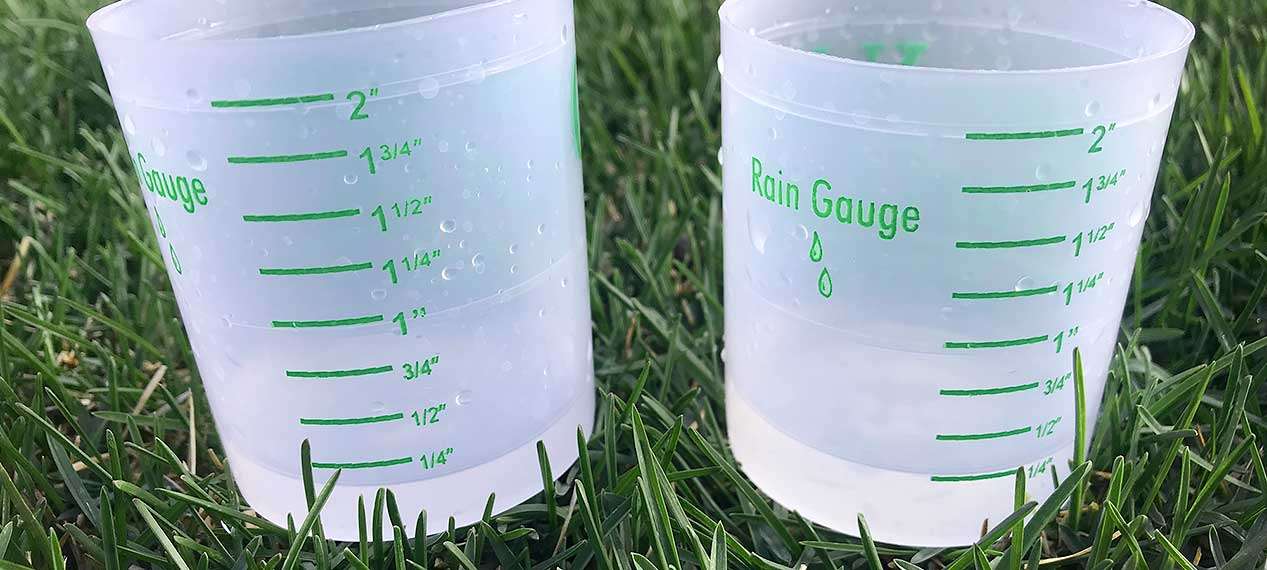
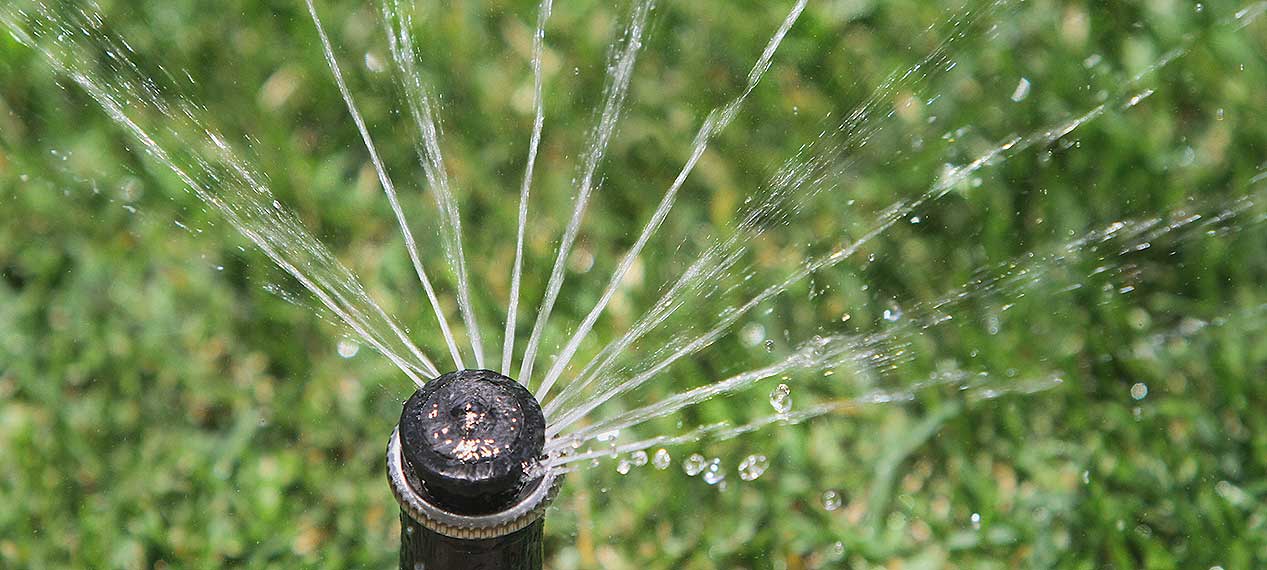
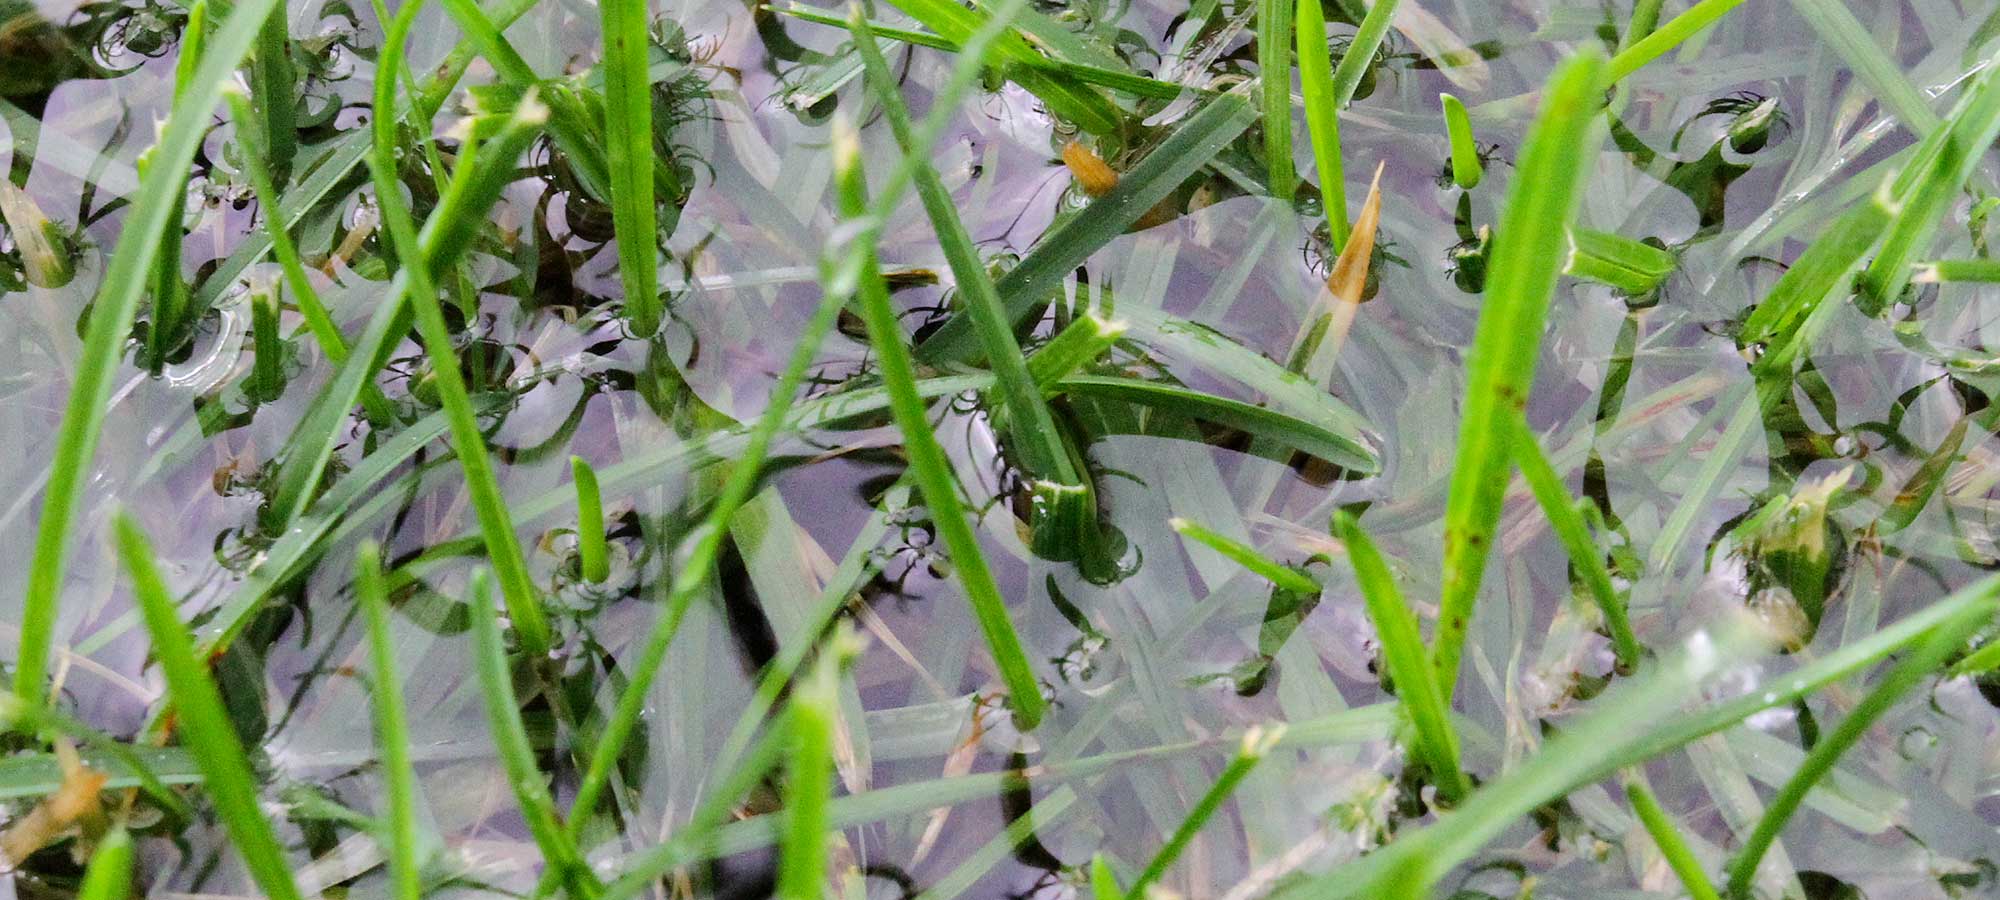
One of the most common reasons why sod turns brown is insufficient watering. New sod requires a lot of water to establish roots in the soil. Make sure you are watering your sod enough, especially during hot or dry weather. A good rule of thumb is to water the new sod daily for the first few weeks, then gradually reduce the frequency as the sod establishes roots.
When watering your sod, it's important to ensure that the water penetrates the soil to a depth of at least 4 to 6 inches. This encourages deep-root growth and helps the sod establish a strong, healthy foundation. You can use a screwdriver or similar tool to check the moisture level of the soil. If the screwdriver easily penetrates the soil, then it's likely that your sod is receiving enough water. If the soil is hard and dry, you'll need to increase your watering frequency or duration.
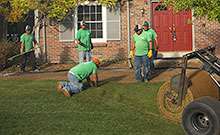
2. Improve Soil Preparation
Poor soil preparation can also lead to brown sod. Before laying new sod, it's essential to prepare the soil properly. This includes removing weeds, tilling the soil, and adding necessary nutrients. Learn more about soil preparation for sod new sod is brown. Testing your soil's pH level and nutrient content can also help you identify any deficiencies that need to be addressed.
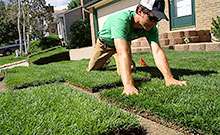
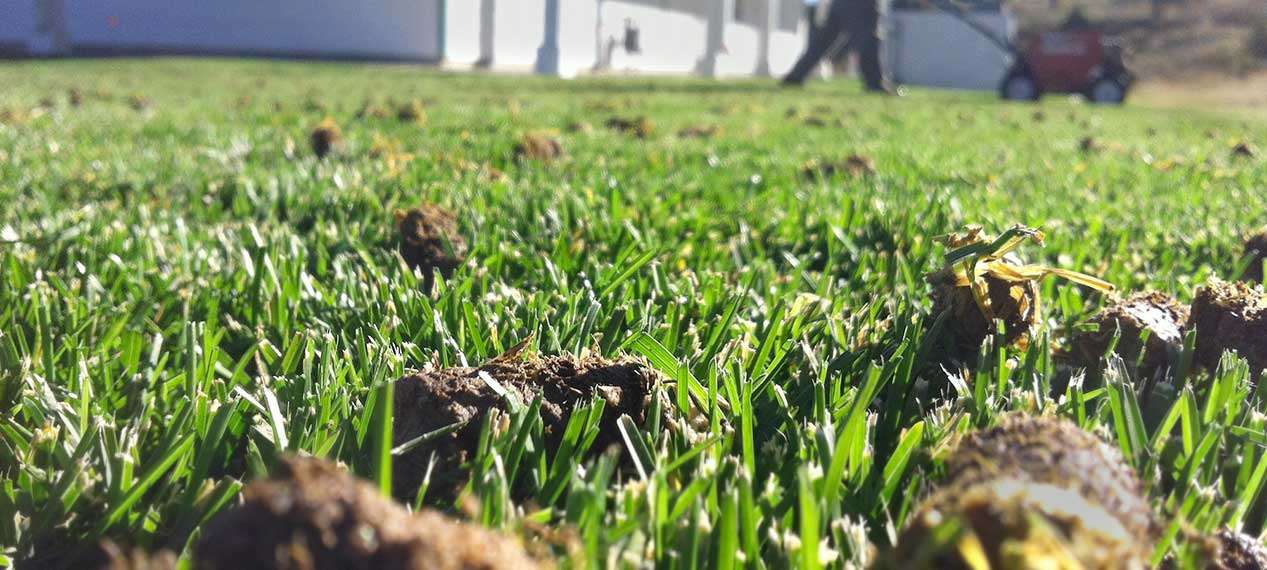
When preparing the soil for sod, it's important to remove any rocks, roots, or other debris that could interfere with root growth. You should also level the soil to ensure that the sod lays flat and has good contact with the soil. If your soil is compacted, consider aerating it to improve drainage and allow the roots to penetrate the soil more easily. Adding organic matter, such as compost, can also improve soil structure and provide essential nutrients for your sod.
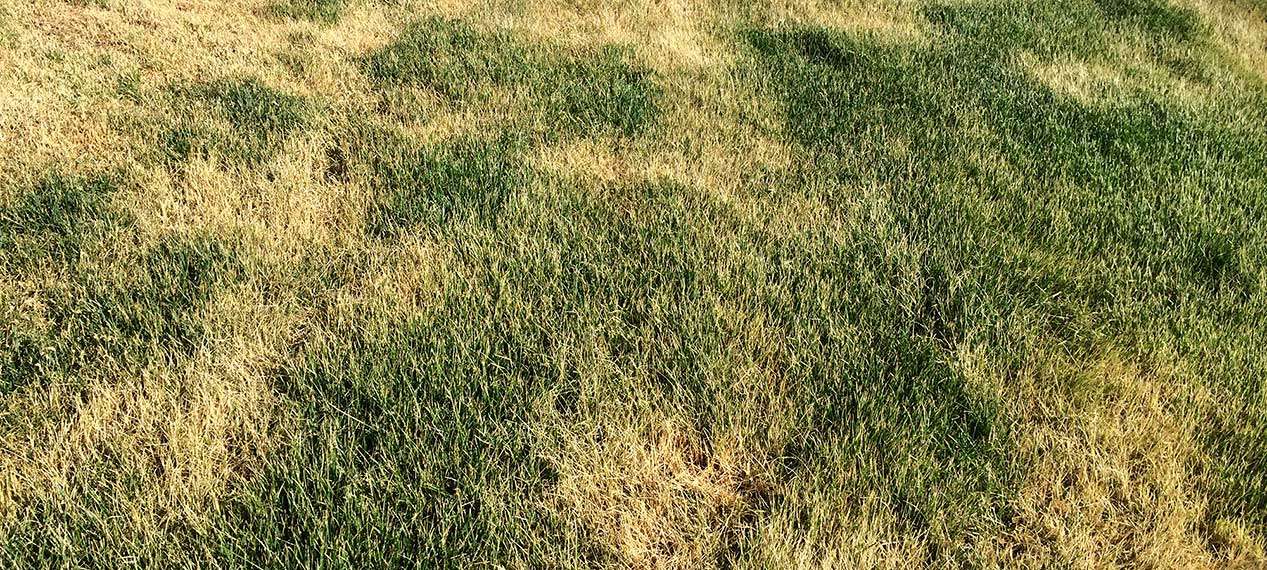
3. Watch Out for Pests and Diseases
Pests and diseases can also cause sod to turn brown. Common pests that affect sod include grubs, sod webworms, and armyworms. Diseases like brown patches, dollar spots, and pythium blight can also cause brown spots on sod. Keep an eye out for signs of infestations or infections and treat them promptly. If you're unsure how to handle pests or diseases, consult with a professional or reach out to your local extension office for advice.
Preventing pests and diseases starts with proper lawn care. A healthy lawn is less likely to be affected by pests and diseases. Make sure you are fertilizing your lawn according to the needs of your grass type, and avoid overwatering, as this can create a conducive environment for pests and diseases. Regularly inspect your lawn for signs of pests and diseases, and treat them promptly to prevent them from spreading.
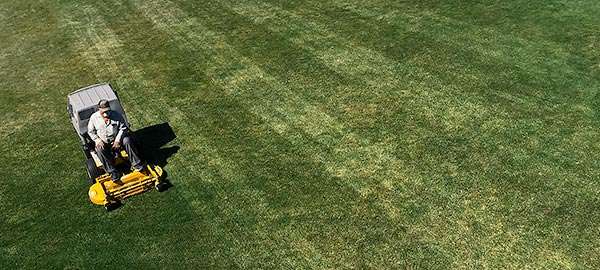
4. Practice Proper Mowing Techniques
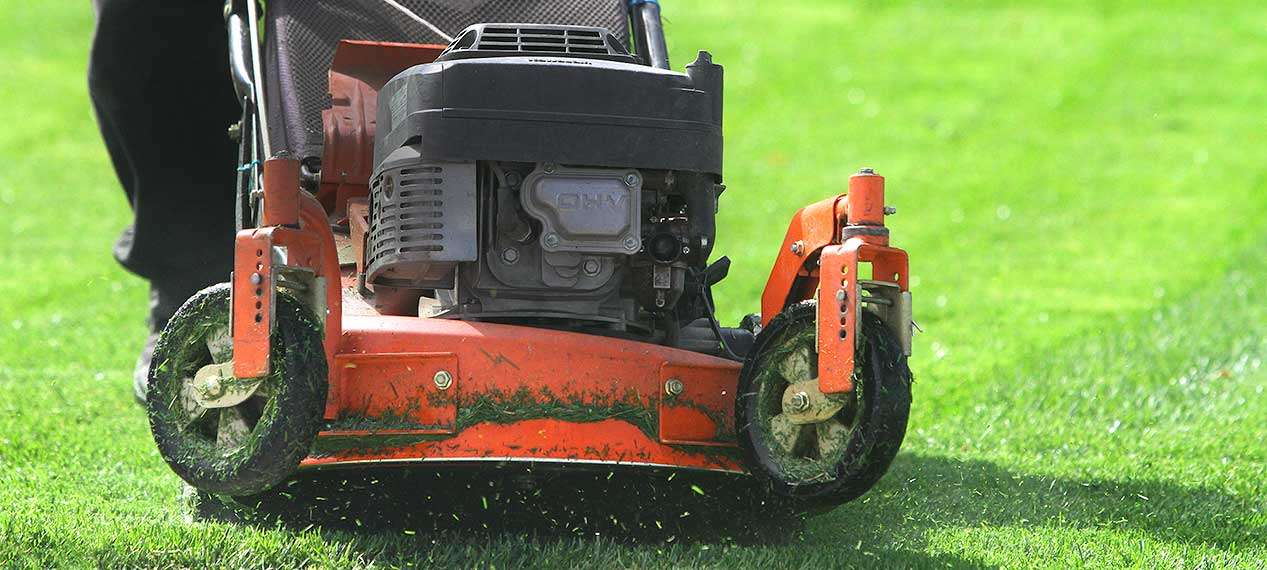
Improper mowing can stress out new sod and cause it to turn brown. Make sure you are mowing at the right height and with sharp blades. Also, avoid mowing when the grass is wet to prevent the spread of diseases. Check out our articleswhy is my sod turning brown and why is my new sod turning brown for options that are easy to maintain.
When mowing your lawn, it's important to follow the "one-third rule," which means you should never remove more than one-third of the grass height at a time. Cutting too much grass at once can stress the sod and cause it to turn brown. Also, make sure your mower blades are sharp, as dull blades can tear the grass and create jagged edges that are more susceptible to disease. Mowing in different directions each time can also help prevent compaction and encourage even growth.
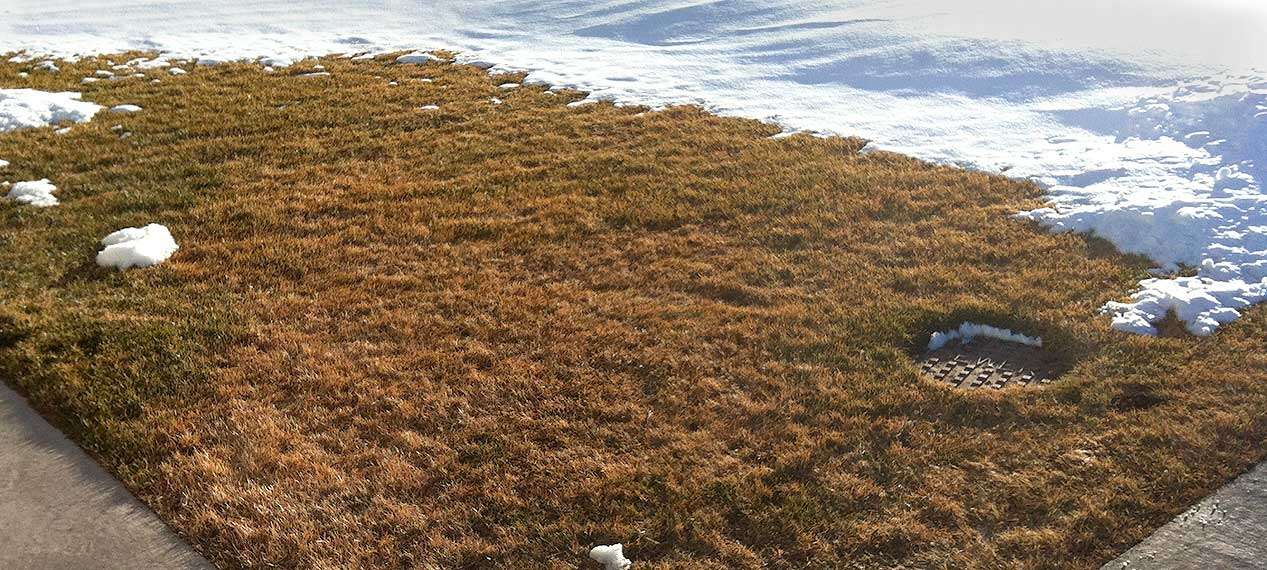
5. Seasonal Lawn Care
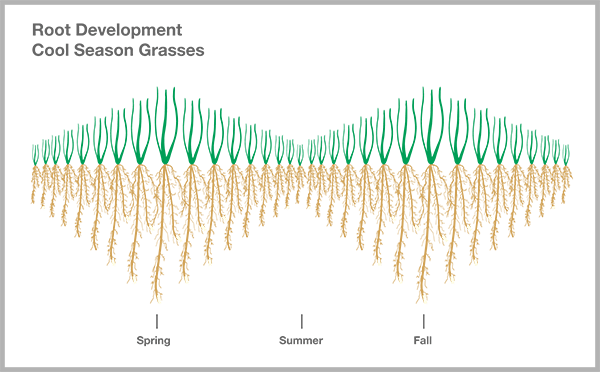
Your lawn's needs change with the seasons, and it's important to adjust your lawn care routine accordingly. In the spring, focus on fertilizing and aerating your lawn to promote healthy growth. During the summer, water your lawn regularly and monitor for pests and diseases. In the fall, consider overseeding to fill in any bare spots and improve the overall thickness of your lawn. Winter is a time for rest, but you can still protect your lawn by avoiding walking on it when it's frozen.
6. Common Mistakes to Avoid
When caring for your new sod, it's important to avoid common mistakes that can lead to brown patches. Avoid overwatering, as this can lead to root rot and other problems. Also, avoid under-watering, as this can cause the grass to dry out and turn brown. Be sure to use the right type of fertilizer for your grass type, and avoid fertilizing during hot or dry periods. Lastly, avoid mowing your lawn too short, as this can stress the grass and make it more susceptible to pests and diseases.
7. Choosing the Right Type of Sod
Not all sod is created equal, and the type of sod you choose can have a big impact on its success. When selecting sod, consider your climate, soil type, and the amount of sunlight your lawn receives. Some types of grass are better suited to certain conditions than others. For example, Bermuda grass is a good choice for hot, sunny climates, while fescue grass is better suited to cooler, shadier conditions. Consult with a professional or your local extension office to determine the best type of sod for your lawn.
8. Tips for Maintaining a Healthy Lawn
Maintaining a healthy lawn requires regular care and attention. Here are some tips to help you keep your lawn looking its best:
Water your lawn deeply and infrequently to encourage deep root growth.
Fertilize your lawn according to the needs of your grass type.
Keep your mower blades sharp and mow at the right height for your grass type.
Aerate your lawn regularly to improve drainage and reduce compaction.
Monitor for pests and diseases and treat them promptly.
Conclusion
With the right care, your new sod should thrive and provide you with a beautiful, green lawn. Remember to water sufficiently, prepare the soil properly, watch out for pests and diseases, and practice proper mowing techniques. If you follow these steps, you should be able to prevent your sod from turning brown and enjoy a lush, healthy lawn for years to come.
For more information on maintaining a healthy lawn, check out our other resources and articles available on our website.
The rabbit population seems to be running rampant this year! It could be due to the extra precipitation we’ve been having. More water leads to more growth in vegetation and creates more food for these furry little guys. If their food is abundant, the number of litters will increase. On average, rabbits have about 2-6 litters per year, each containing up to 6 babies. Rabbits use grass and weeds not only to provide food, but also as shelter for themselves and their young. These furry friends spend the entirety of their life on less than 10 acres total, so there’s a good chance that once they’ve made a home out of your lawn, without deterrent, they’re here to stay.
How Rabbits damage your lawn
Typically, rabbit damage can create big problems for yards. They gnaw plants down to the root and concentration of urine can create brown spots in lawns. If you’ve been noticing spots in your yard that have been suspiciously mowed down and are beginning to brown, our furry friends are likely the culprit. Rabbits love to eat grass, and will munch it all the way down to the crown. This puts a lot of stress on the plant. If areas of your lawn have been damaged, the best thing to do is to fence off the area and keep it well watered and fertilized to help it grow back. The rabbits don’t eat the root system, so your lawn has a great chance of coming back.
Getting rid of Rabbits in your lawn
Although getting rid of established rabbit families is difficult, it isn’t impossible. Rabbits love anything that provides shelter, like low-to-the-ground shrubs, bushes, and taller grass. By eliminating areas they can hide, it makes their lives more difficult. Trim shrubs and bushes, put chicken wire below porches and elevate any decorative garden pieces that may be offering them refuge. You can also cut off their food supply. Fence off gardens, making sure fence openings are smaller than a rabbit’s head and dug 6 inches into the ground so they can’t go underneath. Spraying different odors on your plants, like capsaicin (pepper extract), castor oil, ammonium salts, or predator urine can also help! However, it must be reapplied after every watering or rain. It’s also smart to utilize your pets. Get your dogs to chase the rabbits, or let your cat outside to be the fearsome predator they are!
Rabbit damage can be very frustrating. It creates brown spots in your lawn and can ruin a garden if it goes unchecked. However, with the right prevention and proper lawn care, you can get the furry nuisances to leave your lawn alone!
How to Deal With Rabbit Holes in Your Yard
Discovering rabbit holes in yards can be a significant issue for many homeowners. Not only do these burrows detract from the visual appeal of your lawn, but they can also signal a deeper problem with wildlife in your vicinity. This article will delve into effective methods for addressing rabbit holes and preventing further damage to your lawn.
Understanding Rabbit Behavior
Rabbits are notorious for their digging habits, which can substantially harm gardens and yards. Grasping their behavior is crucial in tackling this challenge. Rabbits dig burrows for shelter and reproduction, potentially increasing their population on your property. Besides the unsightly holes, rabbits can feed on your garden's vegetation and grass, worsening the condition of your lawn.
To gain insights into the impact rabbits can have on your lawn and possible countermeasures, explore our guide on do rabbits eat grass.
Preventative Strategies
Preventing rabbit incursions is crucial. Here are some effective strategies:
Fencing: Erecting a fence can effectively prevent rabbits from accessing your property. It should be buried a few inches into the ground to block digging attempts.
Repellents: Using commercial or natural repellents can deter rabbits. Garlic or chili pepper sprays are useful natural alternatives.
Habitat modification: Making your yard less appealing by removing shelters like low shrubbery can discourage rabbits from settling.
For those facing severe wildlife control issues, understanding the methods for rabbit grass and small mammal management is vital for maintaining a healthy lawn.
Repairing Rabbit Damage
After mitigating the rabbit threat, repairing your lawn is the next step. This may include filling rabbit holes and reseeding damaged areas. A well-maintained lawn can deter rabbits and other wildlife from returning.
For maintaining a pristine lawn, especially post-rabbit damage, our bunny in grass management strategies provide excellent tips.
Professional Intervention
In cases of significant infestations or persistent damage, professional help may be required. Wildlife control experts can offer tailored solutions for a rabbit-free yard and help prevent future issues.
Deciding when it's necessary to seek experts can be aided by understanding the implications of having a rabbit in backyard good or bad. While rabbits contribute to local ecosystems, their presence should not compromise your lawn's health and aesthetics.
Conclusion
Dealing with rabbit holes in your yard can be challenging, but with the right strategies, it's manageable. Understanding rabbit behavior, implementing preventative measures, and repairing damage are vital to maintaining a beautiful, rabbit-free lawn. Effective wildlife management involves balancing your lawn's health with coexisting with local fauna.
No more of those pesky dog spots! Are you a proud owner of a furry friend? Then, you may be noticing some brown spots forming in your lawn where your dog likes to relieve itself.
High concentrations of nitrogen
This phenomenon is caused by the acidic nature of urine, which contains high concentrations of nitrogen present in the ammonia component of your pup’s potty. Female dogs cause more damage because they squat to do their business in one concentrated area. This nitrogen can be good for your lawn when diluted. You may notice around the brown spot there is a green ring. The nitrogen in the dog’s urine causes this dark, green ring of accelerated growth. A dramatic contrast of color between the lawn and the dog spot is a visual indicator of the need to fertilize the lawn.
Keep your yard healthy
Not to worry. There is a quick fix to solve this vexing issue! After Fido has gone to the bathroom, water that portion of the lawn for a few minutes or dump a bucket of water on the area. This causes the nitrogen to dilute and has a positive effect on your lawn. Another trick is to fertilize often. Use less fertilizer, but increase the frequency that you fertilize to once every 4-6 weeks. Fertilizing keeps your yard healthy and allows the injured grass to bounce back quicker, giving your lawn that lovely green color! When you start implementing these lawn care strategies, you will quickly see a difference in the lawn.
How to fix
If your lawn is already plagued with these dog spots, cut out the brown area and patch with new sod. Re-sodding the brown areas is the quickest way to fix this issue. You can also take a 4-6 inch knife and slice into the brown spot multiple times, targeting the areas close to the green section. By cutting into the ground you will be breaking up the root system, specifically the rhizomes from which new plants grow. This allows the healthy rhizomes to reproduce and create new, green grass where Fido browns it.
Now that you know what to do, go tackle those blasted dog spots!
Soil preparation or soil amendment is the most important step in growing a healthy lawn. Without the proper conditions in place, even the finest sod will have a tough time establishing a good root system.
Till in compost before sodding
Soil prep is essentially tilling compost into the ground. Compost is important because it helps the soil already present hold water, be it sandy or clay. In Colorado, our soils are more clay based, meaning that they are very tight and compacted. By putting in compost you are breaking up the solids and infusing organic matter into the ground. By creating space in the soil, there is more room for root growth, gas exchange, and water movement. This allows the plant to get water and essential nutrients more easily. If the root system can grow to its maximum potential, the grass can fight off disease, insects, and be more efficient overall.
How to prepare the soil
You may be wondering how one performs proper soil prep. Well it all begins with the grade! Level the soil to the point where there are no low areas that may collect water to avoid puddles. After you have tackled the grade, evenly spread 3 to 5 yards per 1,000 sq. ft. of the compost over the desired area. This makes the next step, rototilling the compost 6-8 inches deep much easier. It’s important to maintain that depth so the grass can establish a deep and efficient root system. After tilling in the compost, pack the soil back down and fine grade your lawn. The last step before final sod installation is to spread some fertilizer on the soil to add nutrients and give your sod a kick-start in developing strong roots.
Open up clay soil
Don’t forget that the most important part of the plant lives underground! Soil prep opens up clay soils and allows the water to flow into the soil more easily and closes up sandy soils preventing water from draining away too quickly. By giving the soil some attention you can create an environment that will allow the lawn to effectively access the water and nutrients and have a healthy yard.
Even plants deserve a special treat every now and then; indulge your lawn to a night out on the town by fertilizing right before a rain or snow storm!
Snow perks up your lawn
Although you might view these spring snow storms we’ve been experiencing as a drag, your lawn could not be more grateful for the free drink! All the natural precipitation helps your lawn’s root system grow deeper into the ground. A strong and deep root system allows your lawn to withstand higher temperatures and drought conditions with much more ease. If you want to see even better results in the months to come, let your lawn have the full fine dining experience by fertilizing right before a precipitation event. Fertilizer contains all of the essential nutrients your lawn needs to thrive, and water actually activates the fertilizer and allows it to penetrate into the soil. So by fertilizing right before a storm, you allow mother nature to help those added nutrients really soak in.
Snow has a lower pH than most water
Not only does the extra precipitation help your water bill, but the rain and snow is better for your lawn than treated water. Natural precipitation has a lower pH, which helps release nutrients into the soil. This makes it easier for your lawn to absorb nutrients from the fertilizer you put down before the storm. Rain water also has a higher level of nitrogen than treated water. Nitrogen is one of the main ingredients in fertilizer. So it gives the sod an extra kick! Precipitation also provides an extremely even watering and makes sure that the entirety of your lawn is taken care of and no spots have been left out.
Create a healthy lawn
It’s important to thicken up your lawn in the spring instead of during the heat of the summer. This really helps the root system grow deep into the ground. That way, the sod has better access to ground water and nutrients further into the soil and can withstand drought conditions more easily. A thicker and healthier lawn also crowds out weeds, meaning less lawn work in the long run! Creating an extremely healthy and durable lawn starts right now — with Mother Nature’s help. For a healthy lawn all summer long, treat your lawn to dinner and a drink!
Underneath the radiant green of your lawn lies a thriving ecosystem of its own teeming with life, the root system! Every type of grass is unique, with different seasonal growth habits that affect the top growth, or leaves, that you see above ground. Root systems vary just as much as the top growth, allowing some to be more efficient at extracting water than others. Cool-season turf grass, such as our Kentucky bluegrass, Tall Fescue and Texas hybrid bluegrasses, grow roots in the spring, making this the best time to push root growth. With some well-timed lawn care in the early spring, you can help your yard grow a deep root system that will help save water in the hotter months to come.
Stimulates root growth in your lawn
Begin the season by applying a well balanced fertilizer that contains near equal amounts of nitrogen and phosphorus. Nitrogen drives overall plant growth and phosphorus stimulates root growth and devolvement. Both of these nutrients are important in helping thicken your lawn and grow deep roots. As with all fertilizers, read the label and apply the appropriate amount. Too much fertilizer will over stimulate the top growth and divert the plant’s energy from the roots.
Aerate in the Spring
Spring is also the ideal time to aerate your lawn. Aeration helps loosen the soil, which increases the rate and depth that water can move through the soil. Additionally, aeration helps to reduce thatch. Thatch is a tightly intermingled layer of living and dead stems, leaves, and roots which accumulates between the layer of actively growing grass and the soil underneath. Excessive thatch forms a spongy mat layer at the surface of the soil, which can make it hard for water and air to get through to the roots, resulting in weak grass.
A little water goes a long way
Proper watering during the spring months also encourages a strong and healthy root system. The goal of watering is to get the water deep into the soil and then allow the soil surface to dry before watering again. Irrigation requirements are much less in the spring so you can spread out the frequency of your watering. Be sure to keep your sprinkler clock off when you are not watering and to turn it on only when another irrigation cycle is needed.
By fertilizing, aerating, and watering in an efficient manner, you can create a healthy lawn with a deep root system that can stand up to even the harshest of Colorado’s conditions!
Pre-emergent herbicides form a barrier against crabgrass germination
Pre-emergent herbicides can be useful in maintaining a healthy lawn. Herbicides can be categorized as either pre-emergent or post emergent. Post emergent herbicides are applied to the foliage of weeds that are already growing and are visible in your lawn. Pre-emergent herbicides form a barrier in the top inch of the soil and prevent emerging seedlings.
Crabgrass likes heat
Pre-emergent herbicides are most effective on annual grassy weeds like crabgrass, barnyard grass, and goosegrass. Crabgrass creeps in where the soil heats up earlier in the year and where the edges of the lawn are exposed. Colorado homeowners often experience crabgrass infestation adjacent to sidewalks, patios and hardscapes.
Stop crabgrass from germinating
A great way to combat these grassy weeds is to apply a spring application of pre-emergent. Pre-emergent herbicides can be purchased in liquid or granular form. In granular form, many pre-emergent products are combined with fertilizer. In Colorado, the best time to apply a pre-emergent herbicide is March to early April before grassy weeds germinate. It is best to aerate prior to applying pre-emergent so the chemical barrier is not broken. Due to large swings in temperature during late winter and early spring in Colorado, grassy weeds start appearing in March and April. When conditions favor earlier than normal crabgrass germination and you have missed pre-emergent application, use a post emergent herbicide to eradicate crabgrass. Post emergent applications for crabgrass are most effective in the early or juvenile stage of weed growth. Be sure to spray when the temperatures are above 60 degrees Fahrenheit.
When your grassy weed problem is limited to border areas of your lawn, consider a 3 foot band application of pre-emergent as an alternative to a blanket application over your entire lawn.
The last two weeks of February have finally ushered in snow along the Front Range; you remember the white stuff. While many bemoan the shoveling and icy roads, winter enthusiasts invoke images of powder days on the slopes. No matter what your perspective is on snow, it is a much needed welcome shot of moisture.
Snow insulates your lawn
Snow cover on your lawn is very beneficial during the winter months. Snow not only provides much needed moisture for grass and plants, but also forms a protective insulating shield from damaging cold, dry conditions. Snow cover can be particularly beneficial on sun exposed, south facing areas. The absence of snow cover may necessitate winter watering of grass, trees, and shrubs to insure a healthy landscape come spring.
Snow stops mite damage to your lawn
Weakened drought stressed grass is particularly susceptible to damage from mites. These tiny insects can often be seen in mass numbers in late winter through spring on south facing structures like the side wall of a house. Treatment for both banks grass and clover mites can be as simple as keeping areas prone to drought stress watered or covered with snow. Enjoy the white stuff; it does more than cause slippery roads. Snow is exactly what your lawn needs.
Spring is a terrific time to sod! Beat the summer heat and install sod now when the temperatures are cooler. In spring, the root systems of Bluegrass and other cool season grasses will come alive and will root quickly. The warm days and cool nights create a perfect environment for growing and knitting new sod together; ideal conditions for developing a root system before the summer heat hits. New sod uses less water this time of year. Irrigation cycles in spring will be shorter, and it will be easier to keep your new sod damp during its first critical two weeks. During summer, watering becomes a critical issue as new sod can dry out quickly.
Frost or snow will not harm new sod.
Don’t worry about snow or freezing temperatures. Once the ground is unfrozen and soil temperatures are above 32 degrees, Kentucky Bluegrass, Tall Fescues, Texas Hybrids, and Fine Fescues start to grow. Frost or snow will not harm new sod. Colorado spring snowstorms will actually insulate new sod and help it grow. If we do get a cold snap, it will be short lived. So, if you are considering installing new sod this year, spring is one of the best times to establish your new lawn from sod.
Now that the snow has melted from north facing areas, we are seeing gray snow mold. These matted areas occur when your grass is covered with snow for prolonged periods of time and temperatures are slightly below freezing.
Freeze thaw promotes snow mold
The freeze and thaw that takes place under the snow is what causes this disease to form in the spring. The damage caused by snow molds is seldom serious. Now that the snow is gone, the best thing to do is gently rake the matted turf allowing it to dry. Gray snow mold activity stops when the temperature exceeds 45° F or the surface dries. In a few weeks, your grass will be green and healthy.
If you are seeing strange patterns in your snow covered lawn or discovered tunnels through your grass blades, you may have Voles. Voles or Meadow Voles live along the Front Range and are a small mouse-like creature, 3 to 8 inches long. Voles like to make tunnels in your lawn when it is covered with snow and remove all the grass blades leaving dirt trails. These little rodents like damp marshy areas and will come into your lawn from open fields. Voles eat a variety of grasses, trees and shrubs, especially during the fall and winter. Most damage occurs in the winter when voles move through their grass tunnels under the protection of snow. Their excellent burrowing and tunneling ability gives them access to sensitive areas without clear or early indication.
Voles Reproduce Quickly
Voles reproduce very quickly and have average litters of 5 to 10 youngsters. Due to this short reproduction cycle, vole populations can grow very large within a very short period of time. A single pregnant vole in a yard can result in a hundred or more active voles in less than a year. Voles eat succulent root systems and will burrow under plants or ground-cover and eat away until the plant is dead. Bulbs in the ground are a favorite meal for voles.
Snow Covered Lawns
So, if you see tunnels in your snow-covered lawn, break them up and remove any piles of snow. Damage to lawns can be reduced by close mowing in the fall before snow arrives and by removing tall grassy cover near lawns. If the problem is extreme, mousetraps can be placed in the tunnels or near burrow holes. The most effective control is to remove the snow from the lawn and they will retreat. To repair tunnel damage in your lawn, rake up the dead grass, fertilize with 20-20-10 and water the effected areas early in spring. This will help the bare areas re-grow from the roots deep in your lawn and it will fill in.
Mushrooms in your Lawn? Don’t panic. We are getting a break from the hot and sunny weather with monsoonal thunderstorms. The cloudy cooler weather and rain is bringing on mushrooms in turf areas. Finding mushrooms in your yard is a sign your lawn is too wet. This is common in newly sodded lawns, especially when the weather cools down and it rains for a few days. When temperatures are in the high 90’s and you are establishing new sod, it can be tough to water just the right amount. If mushrooms show up, back the water off a little bit. If you are getting rain, turn off the sprinkler system. Once your lawn starts drying up, turn the system back on. You also may need to adjust your sprinkler clock when it cools down for a few days, using the seasonal adjust to decrease lawn watering.
Where do they come from
Mushrooms come from fungi that live in your lawn’s soil. The mushrooms you see in your yard are the fruiting body of naturally occurring fungi living within the soil. Mushrooms grow up very quickly and are a great indicator that your lawn is too wet. Let your yard dry out and the mushrooms will disappear quickly. Never eat lawn mushrooms because some are poisonous. If you have children or pets in the yard, you can rake them up or pull by hand to insure your yard is safe for play.
Lawns in Denver are starting to green up and if you have not fertilized your yard, it’s time. After winter dormancy and a dry winter, your yard may be hungry. Fertilizer is food for your lawn and the last time it had any nutrition was probably last fall. Cool season grasses like to fill in this time of year and an application of fertilizer goes a long way to improving your root system and filling in weak spots. Spring fertilization will set your yard up for summer. Your lawn gets nitrogen from rain and snow. After a dry winter, give your yard some nutrition. Have a look at your yard and rate it. Good condition (even and dense), OK condition (could be thicker with a few problem areas), or Poor condition (thin & bare, not healthy). Now, let’s talk about fertilizer.
Understanding Fertilizer
There are many different types and brands of lawn fertilizer, but one aspect they all have in common are the 3 numbers on the front of the bag. The 3 numbers represent the ratio of the three nutrients that make up most fertilizers. This is called the N-P-K ratio. A 20-20-10 is made up of 20% Nitrogen, 20% Phosphorus and 10% Potassium.
N for Nitrogen, makes grass grow and become greener. This generally is the most important nutrient to having a nice lawn. Traditional release nitrogen will work fast but only stay in the soil for a few weeks due to plant uptake and leaching. This is not necessarily bad if your lawn is hungry. Slow release nitrogen stays around a few months and feeds your lawn more evenly. Organic Nitrogen sources feed very slowly and may take 1 to 2 months to see results.
P for Phosphorus, stimulates roots and new plant development. Phosphorus is important to the root system and will help thicken up your yard. Phosphorus will stay in your soil for at least a year.
K for Potassium, promotes disease and drought tolerance. Potassium prepares your lawn for the heat of the summer as well. Potassium stays in the soil for several months.
What type of Fertilizer?
There are many lawn fertilizers to choose from. Look for a fertilizer that is made for Colorado soils. Using a fertilizer with 20% nitrogen is easier to spread evenly than a fertilizer with 46% nitrogen because you have more products to work with. Smaller bags of fertilizer (10 lbs. to 20 lbs.) tends to mean higher nitrogen numbers, less Phosphorus & Potassium numbers, cost less, are not as effective in our dry climate.
Traditional, Slow Release and Organic lawn fertilizer
20-20-10 1fe
This is a fast release fertilizer that has a fast release Nitrogen with plenty of Phosphorus & Potassium. Full analysis or balanced fertilizer has close to all three nutrients stated by the numbers, the N-P-K. If your yard is in Poor or in OK condition, or if your yard is in Good condition and you want to green it up quickly, use a full analysis fertilizer. This is a good safeguard because now your yard is getting all the nutrients and will not have a nutrient deficiency later. Remember, Phosphorus and Potassium stay around in the soil longer than nitrogen. Iron (fe) and sulfur are good for you lawn as well.
20-5-5 1fe Slow Release
This is a slow release fertilizer. The nitrogen source in this fertilizer is half slow release and half traditional. Also notice the Phosphorus and Potassium are only 5’s. This is because if you fertilize 2 to 3 times a year, your soil should have enough P and K in it. Slow release fertilizers promote even growth so you do not get a growth surge right after you fertilize. Use slow releases fertilizers if your lawn is in Good condition. If your yard is in OK condition and you’re not concerned with winning the best yard on the block award, this is also a good choice.
8-2-1 100% Organic
Organic nitrogen in this case, is derived from dried poultry manure, releases very slowly over months and may be around for up to a year. Notice it is 8% nitrogen meaning you will need to use more products to get the same amount of food for your lawn. There is less nitrogen in this fertilizer and it will release very slowly over months. When you use an organic fertilizer, it takes a while to see the results and you will use more pounds of fertilizer to make up the difference. Organic fertilizers can be used with traditional lawn fertilizer to help condition and build nutrients into your soil. One more thing, the earth’s atmosphere consists of 78 percent nitrogen. Now get out there and feed your yard!
March is the time to apply preemergence if crabgrass or weeds were a problem in your yard last season. Use a preemergence herbicide or “Crabgrass Preventer” now before weeds and grassy weeds start germinating. Temperatures are very warm this March and lawns are greening up. This means weeds and grassy weeds will be showing up soon.
How it works.
Crabgrass preventers stop most weed and grassy weed seeds from germinating. These products keep all the unwanted seeds that end up in your yard from sprouting. Most of these products last 6 to 8 weeks, so a second application is recommended in May, especially if your yard has a history of various weed problems. After you apply this granular product with a fertilizer spreader, water it in to your yard within a day. If you have not turned on your sprinkler system, use a hose and water in by hand or apply before we get some precipitation. A quick application of Crabgrass control will cut down on spring lawn care and let you enjoy your lawn this spring!
Canadian Geese in the Denver area love to feed on turf grass lawns and can create quite a mess. If left unattended, geese can do some serious damage due to over grazing and smothering your lawn with goose droppings. If Geese have moved into you yard, try to break their habits and keep them off the yard when it is wet. This is when the most physical damage will occur. If goose droppings become thick enough to smother the lawn, simply remove the droppings with a rake or a leaf blower. Canadian Geese on your lawn is only a serious problem if they graze the turf down to the dirt and harm the base or crown of the grass plant. So enjoy the new company unless they really start making a mess.